
Trace a Custom Horizon
Note: Horizon tracing proceeds from an existing location. If you don't already have a location you wish to augment with a custom horizon, create one first (instructions for that here).
Step 1:
Stand exactly where you wish to place your telescope. Hold the phone at a height at or near your OTA height.
Step 5:
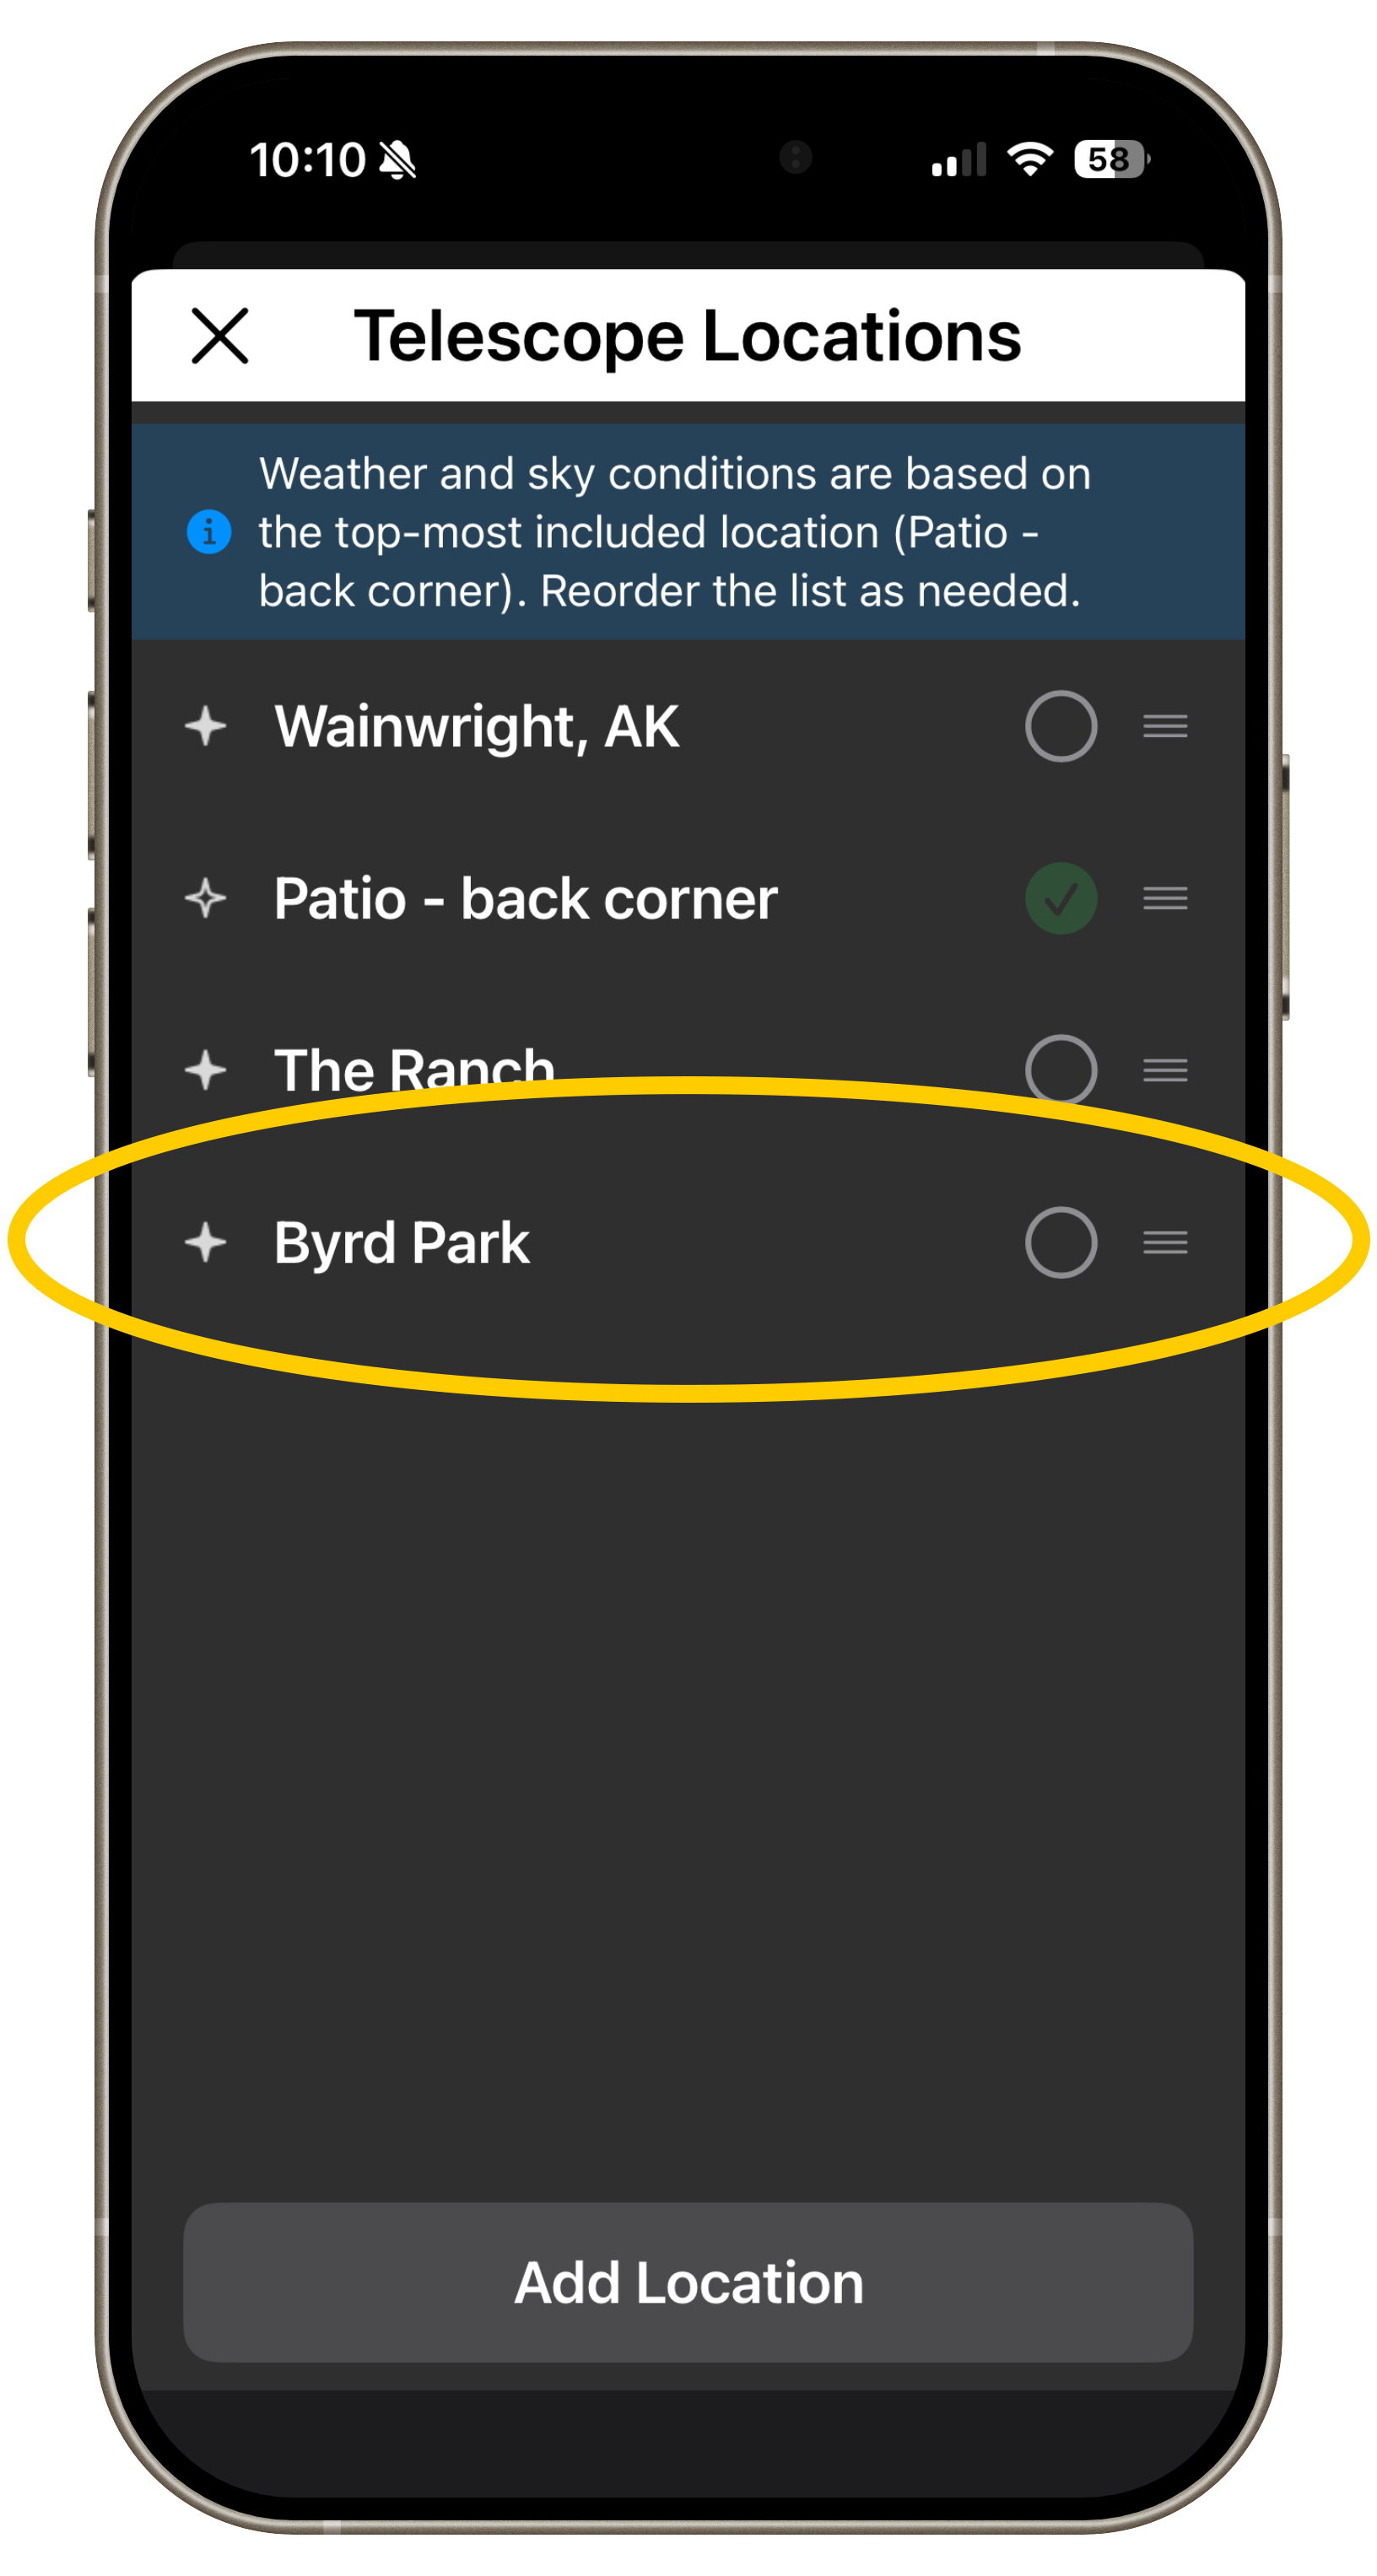
Step 2:
Select the location to which you wish to add a custom horizon.
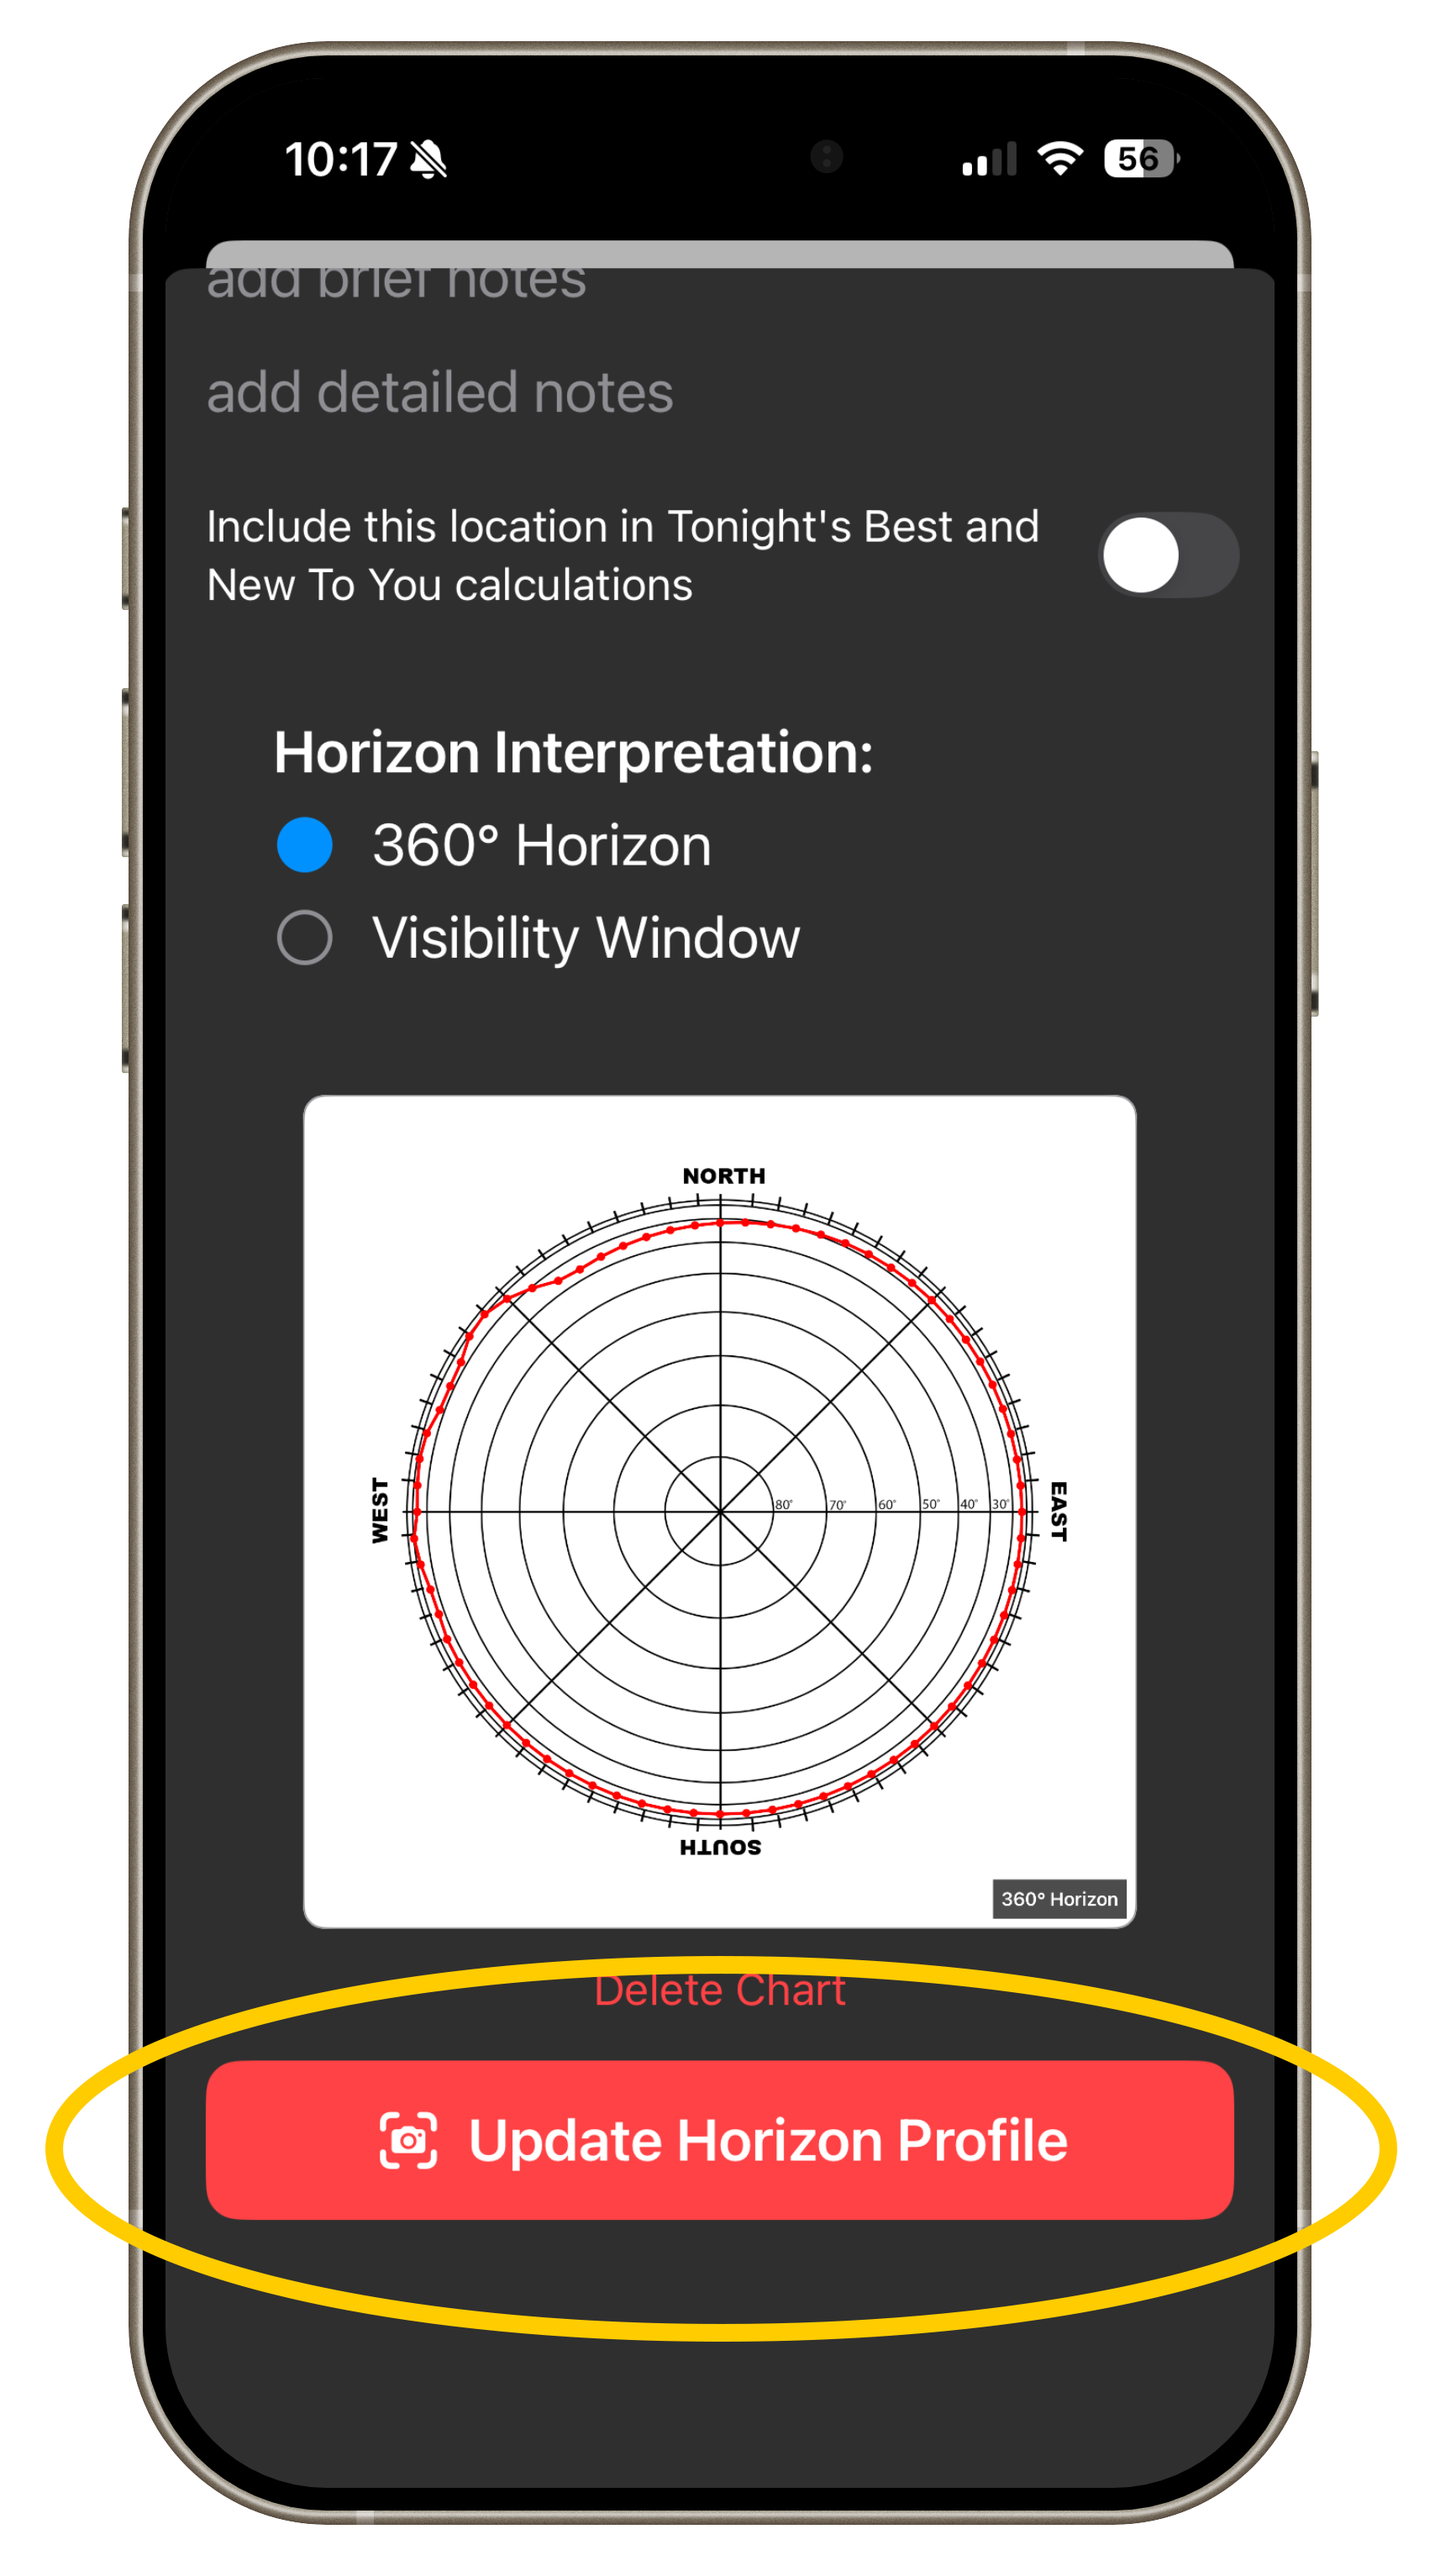
Step 3:
From any Location's detail page, click "Create Custom Horizon" at the bottom of the page.
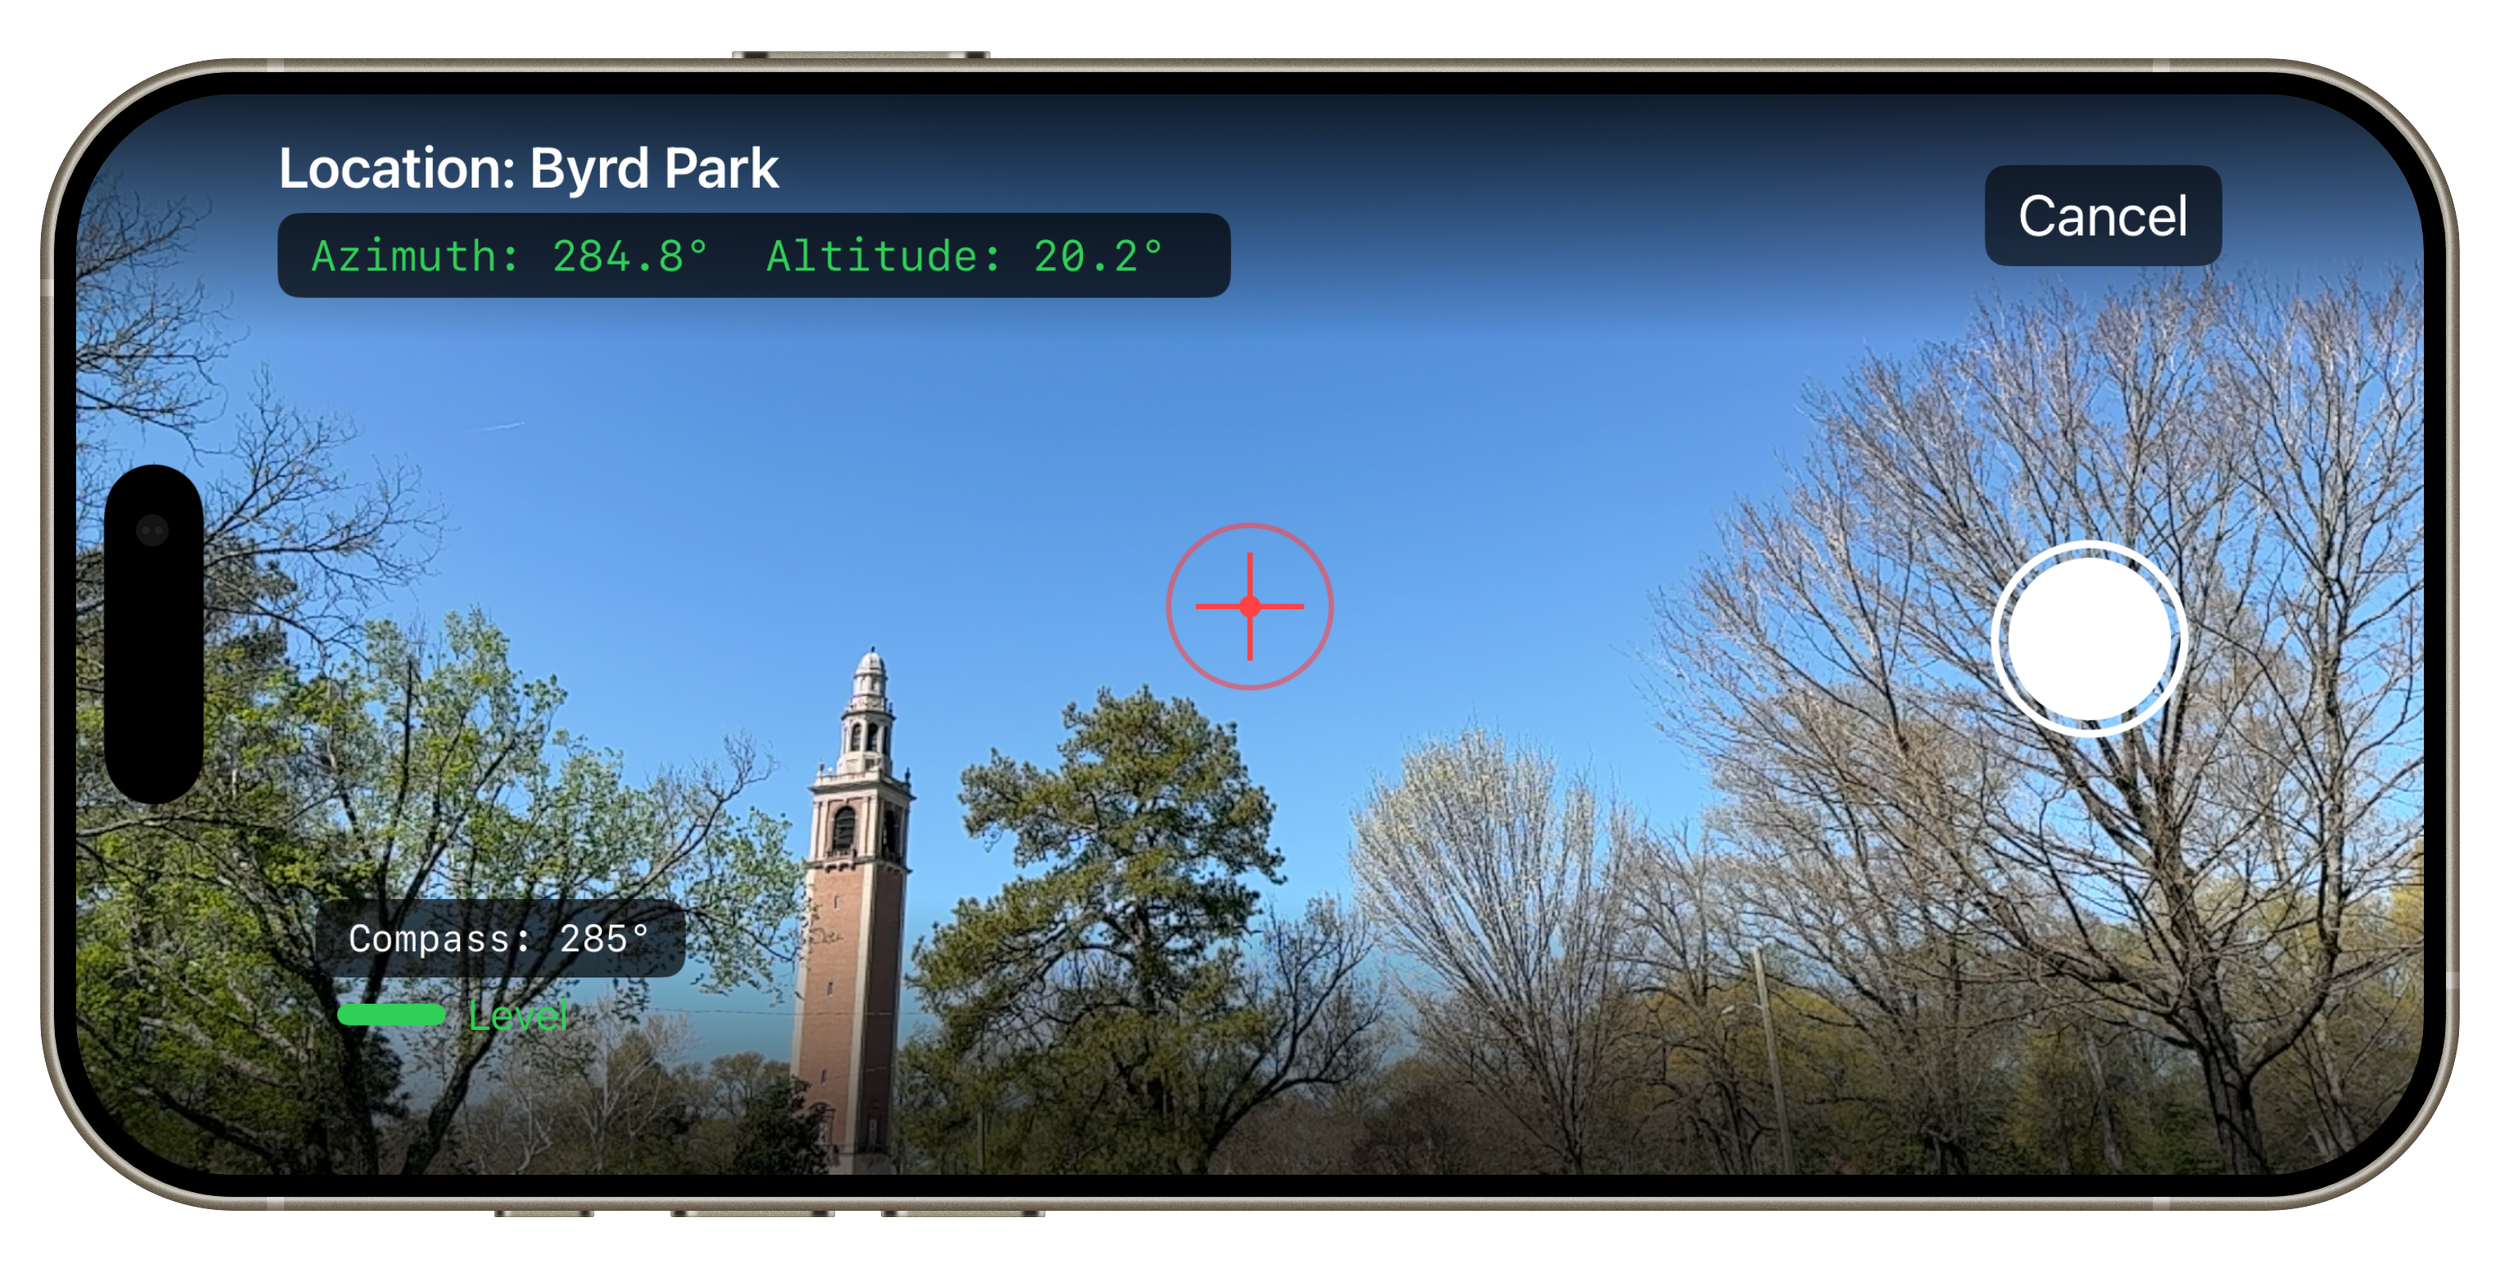
Rotate the phone horizontally
Step 4:
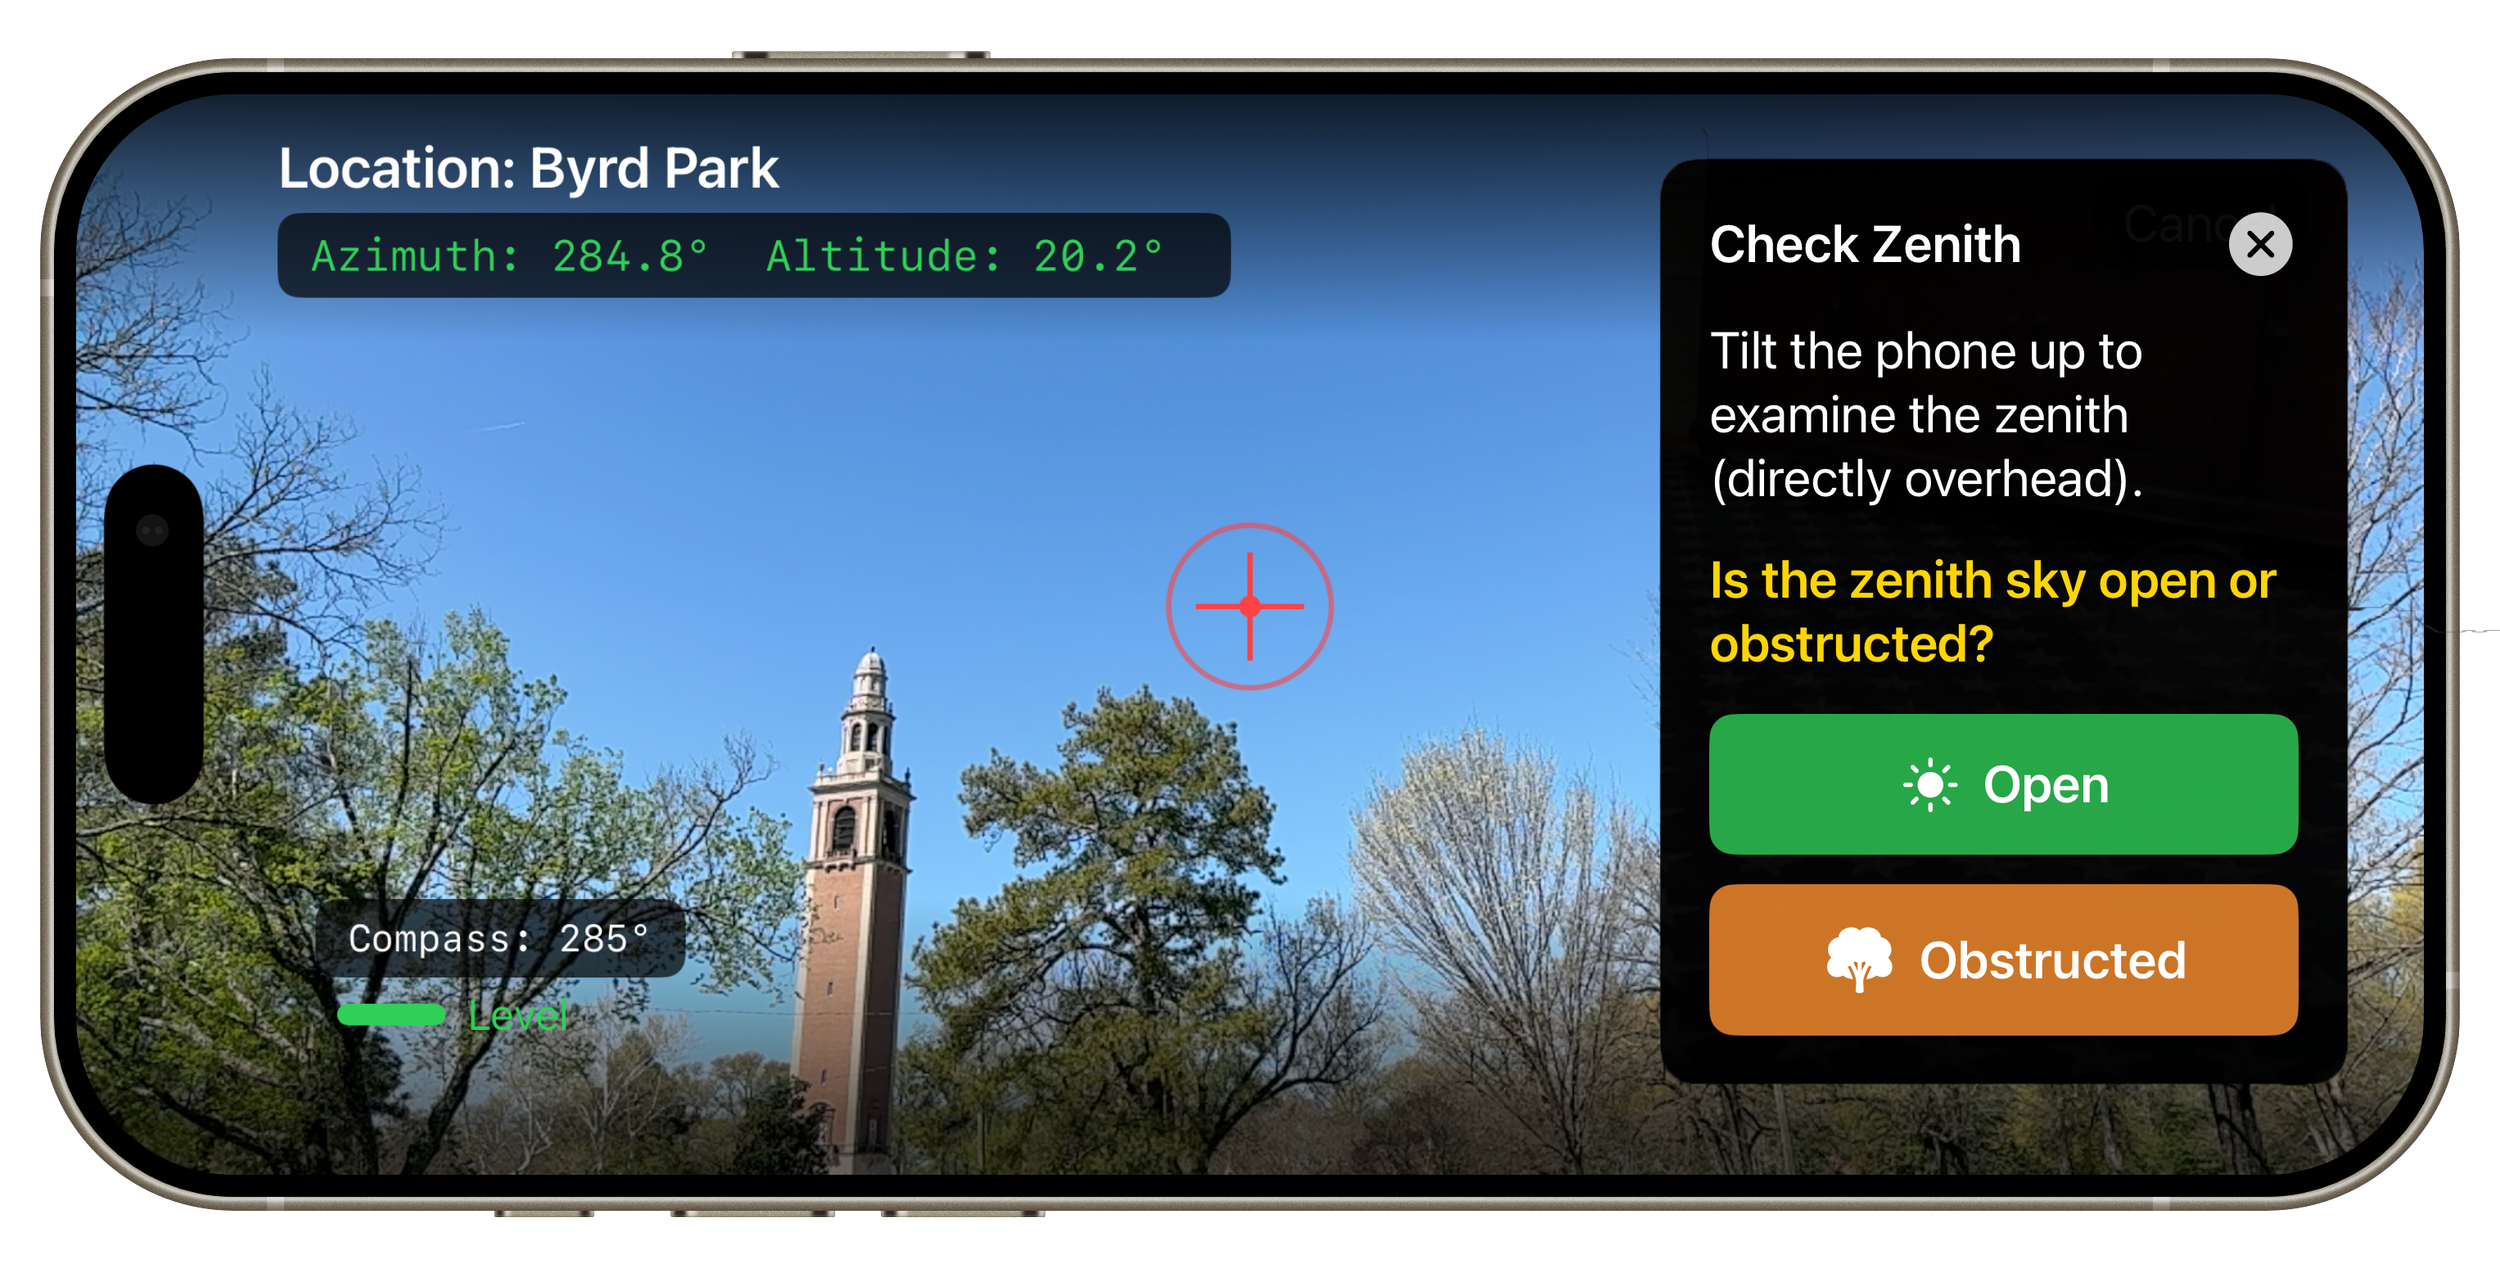
Indicate whether the zenith, directly above the telescope location, is open or obstructed. Just look up, or tilt the phone up for a virtual zenith.
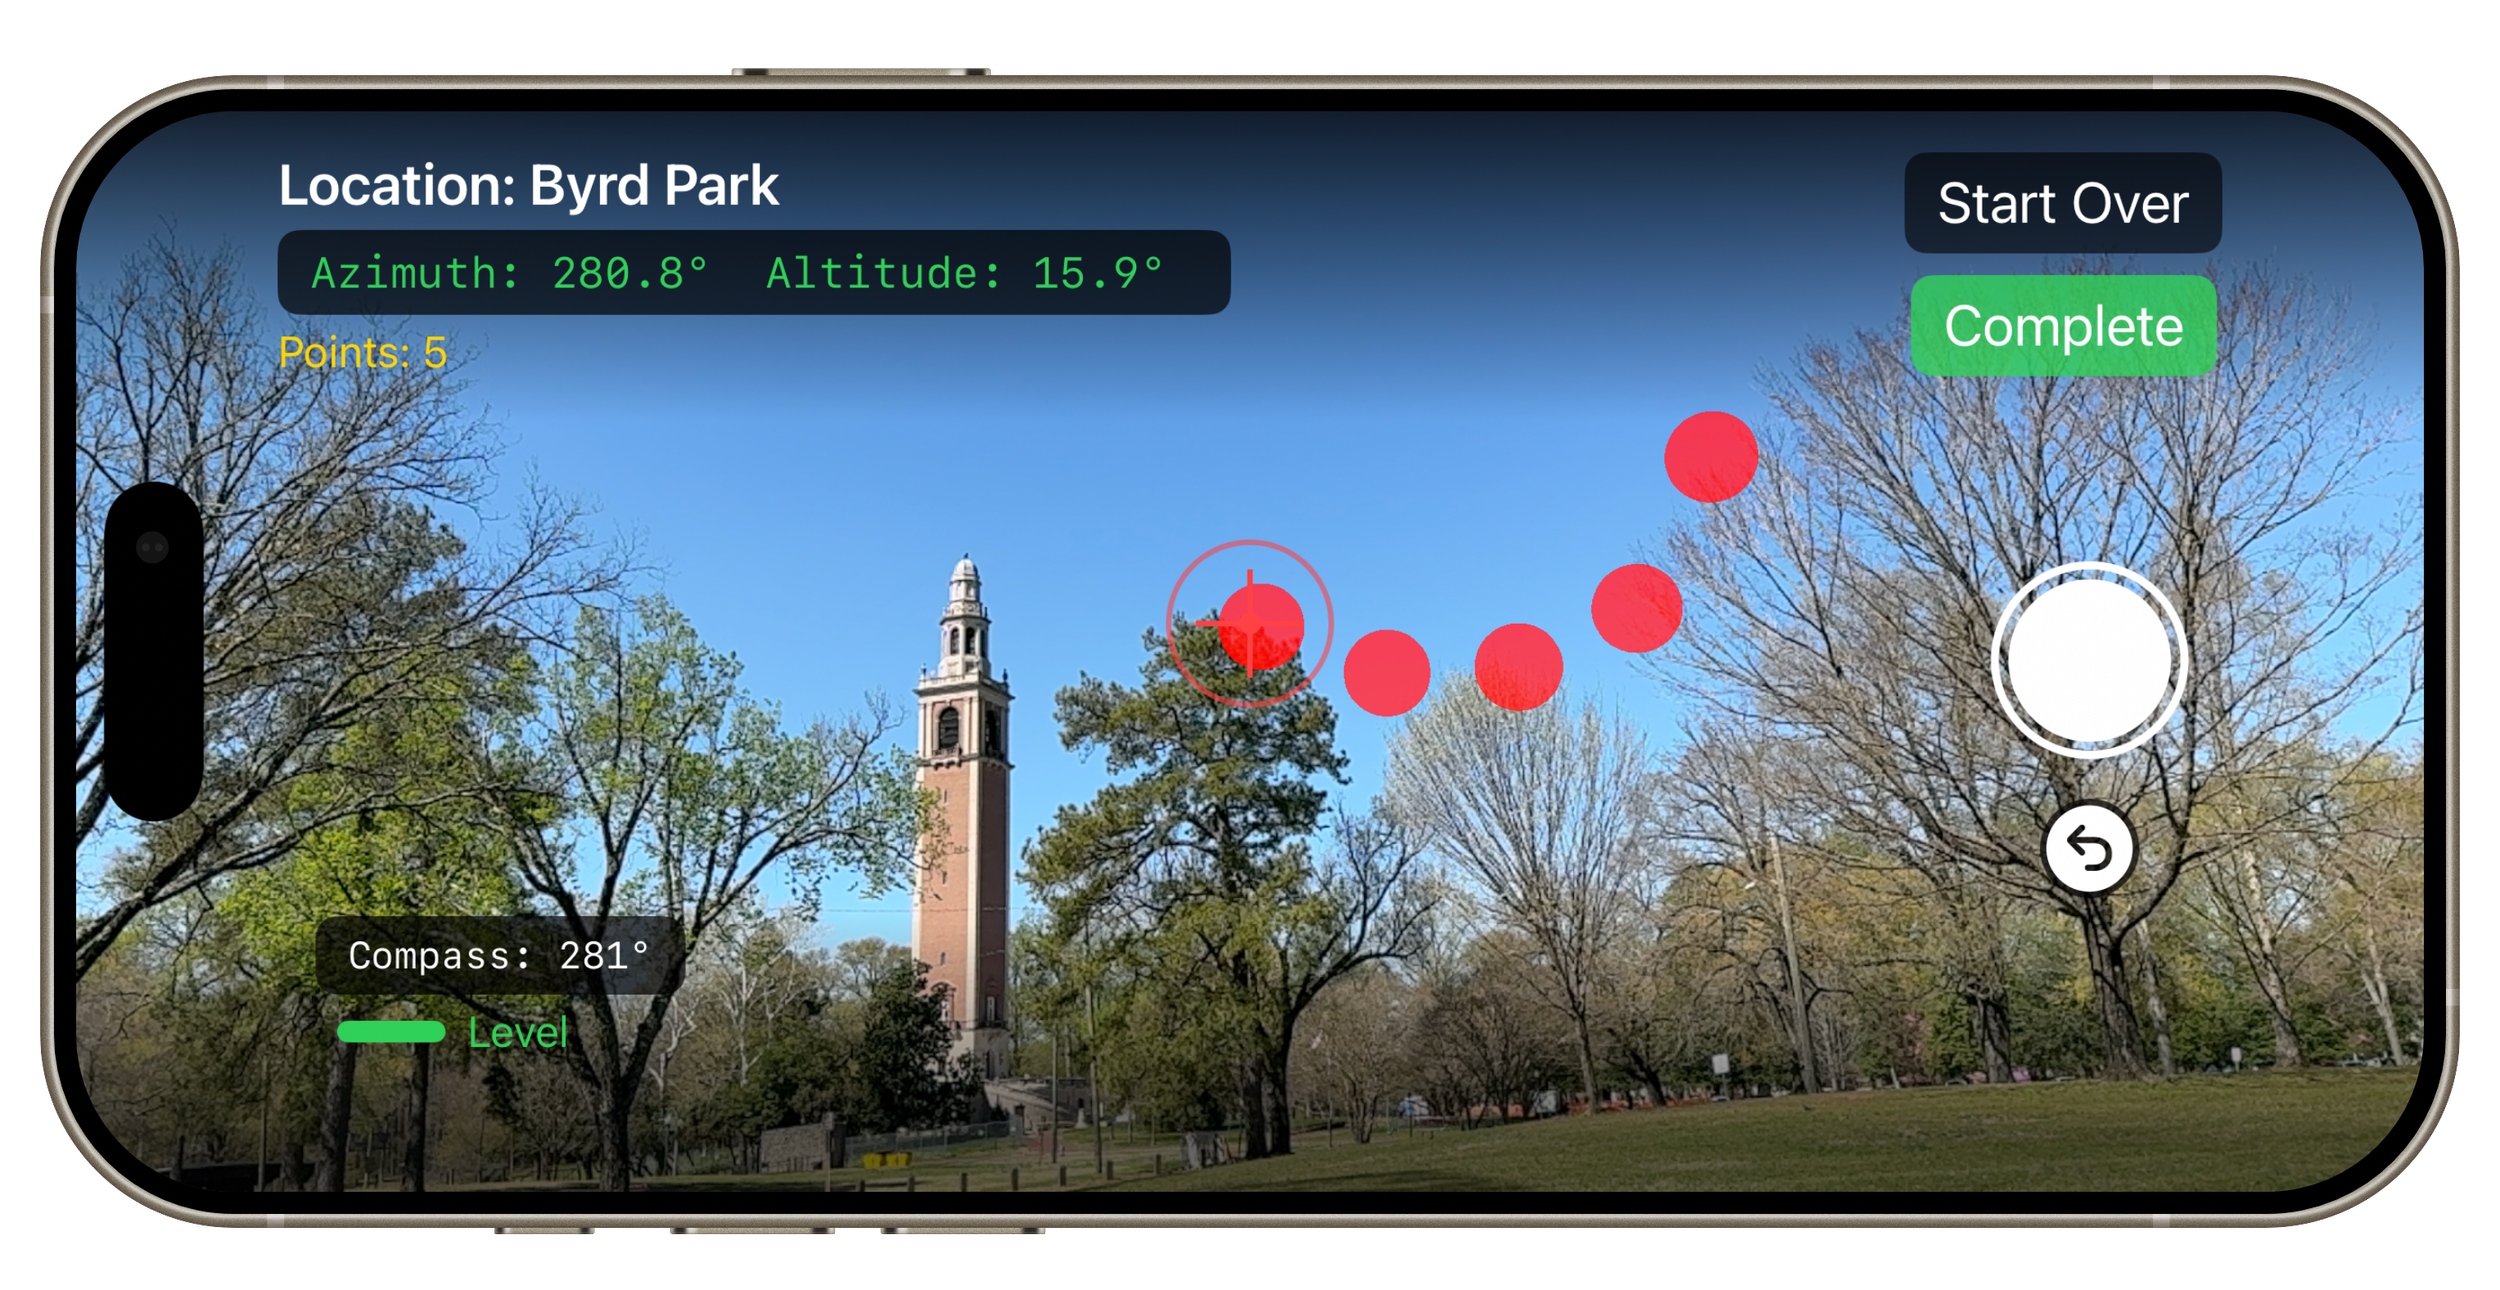
Step 6:
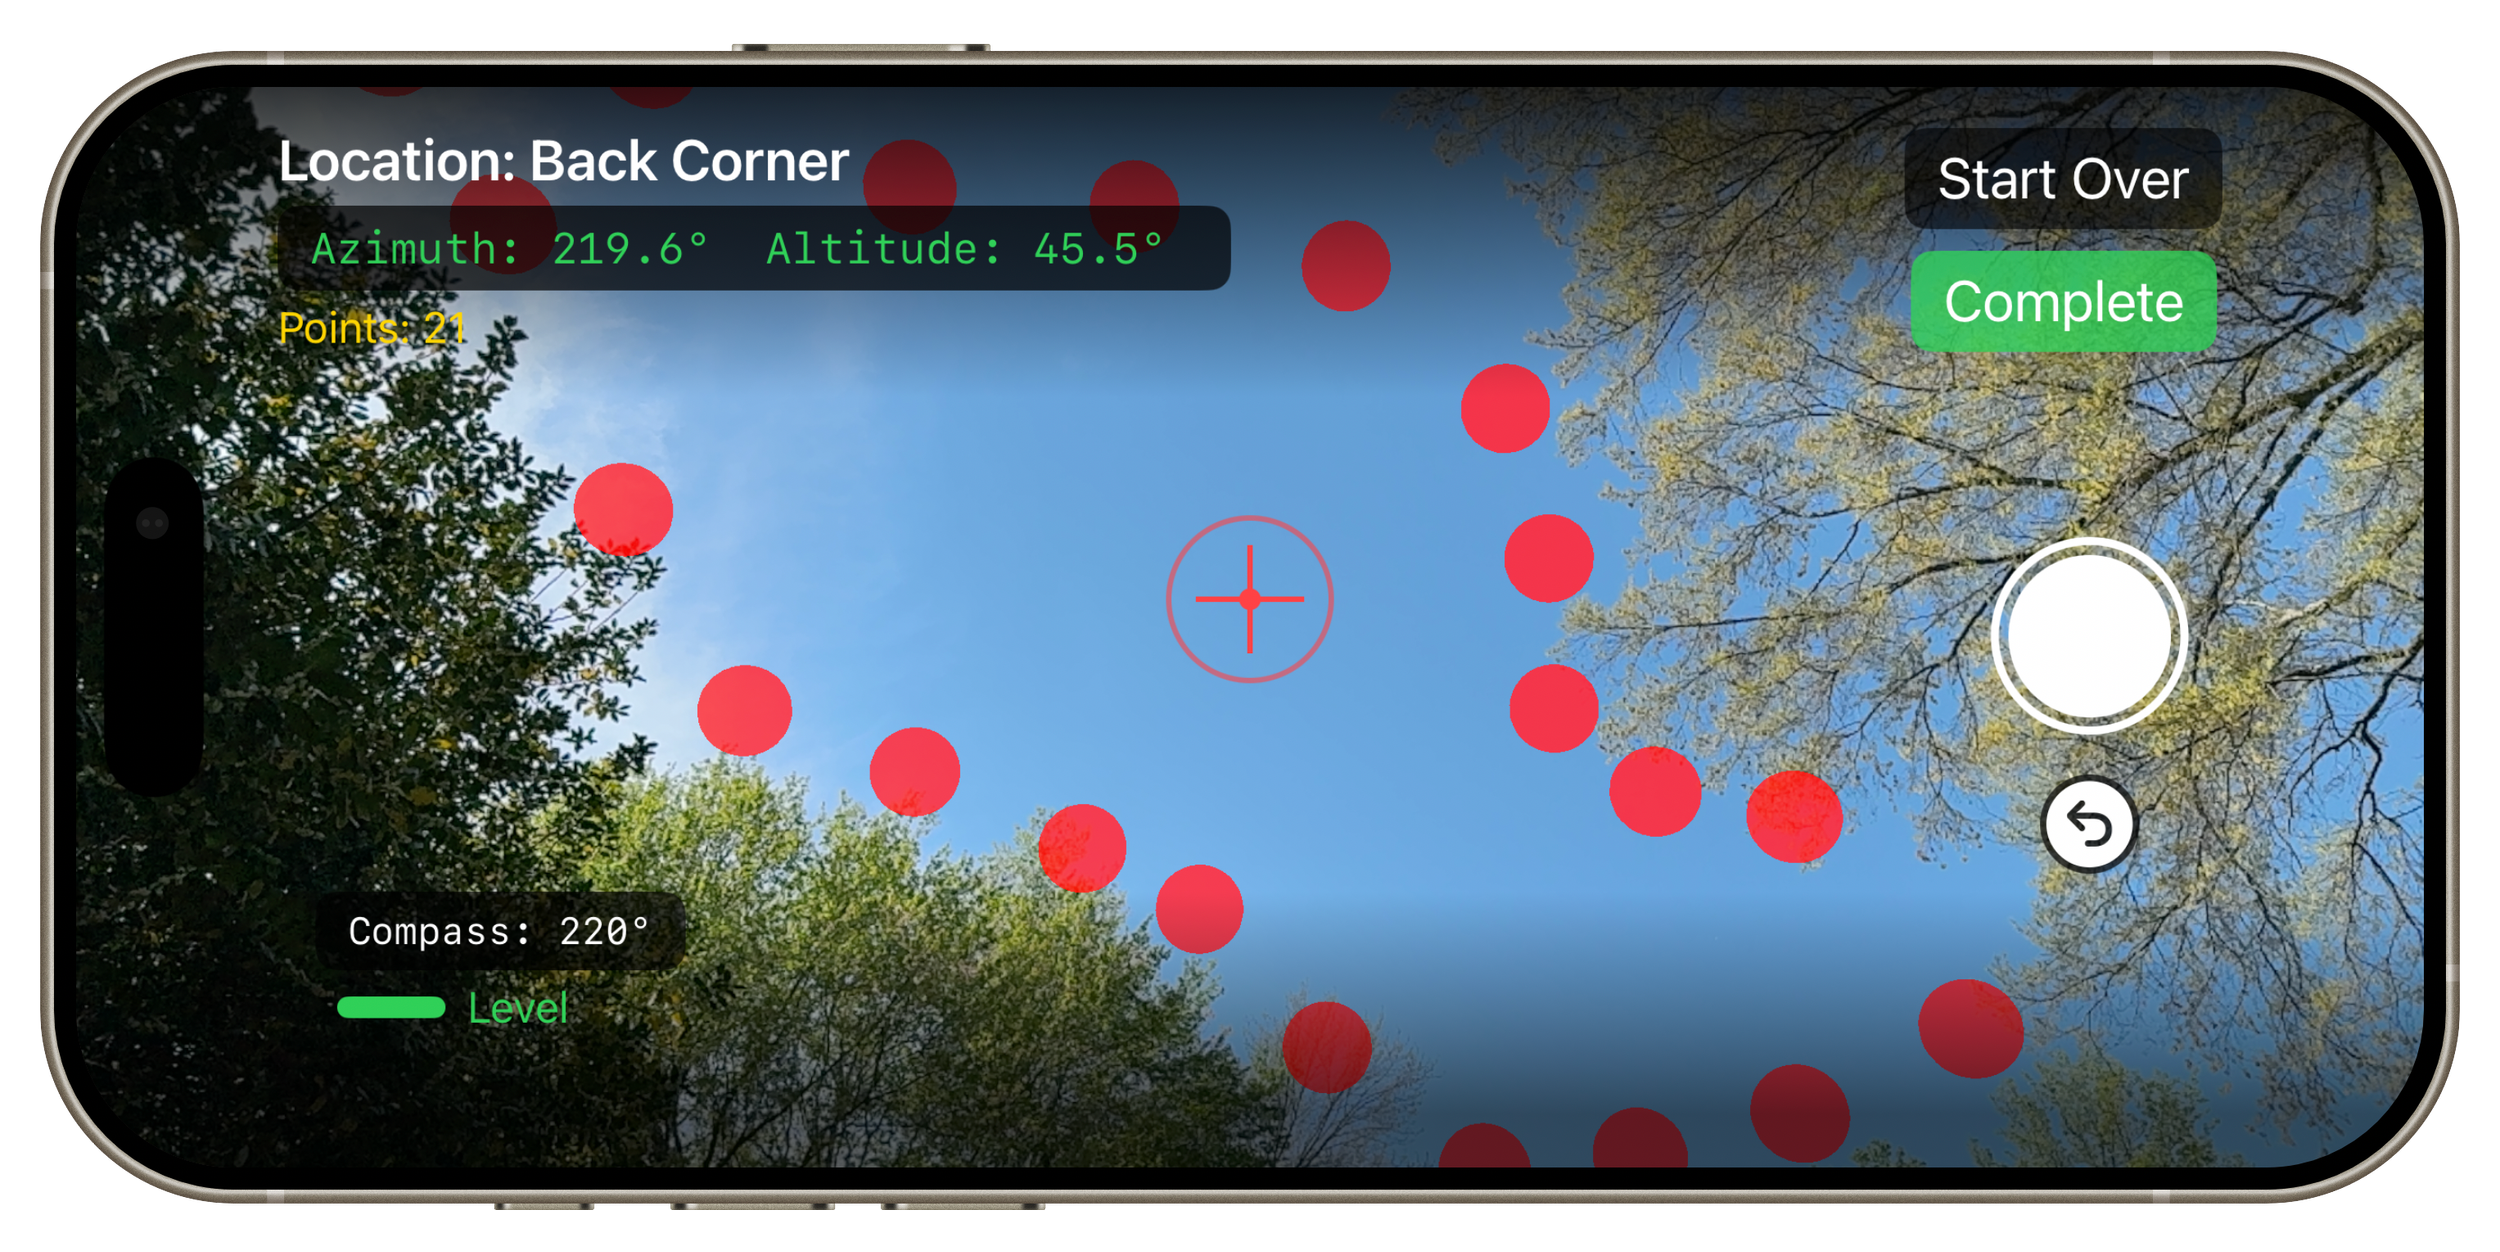
Use the camera view to place virtual points on the border of the open sky and obstructions. Go around 360 degrees for a complete horizon, or trace a window of visibility through the canopy.
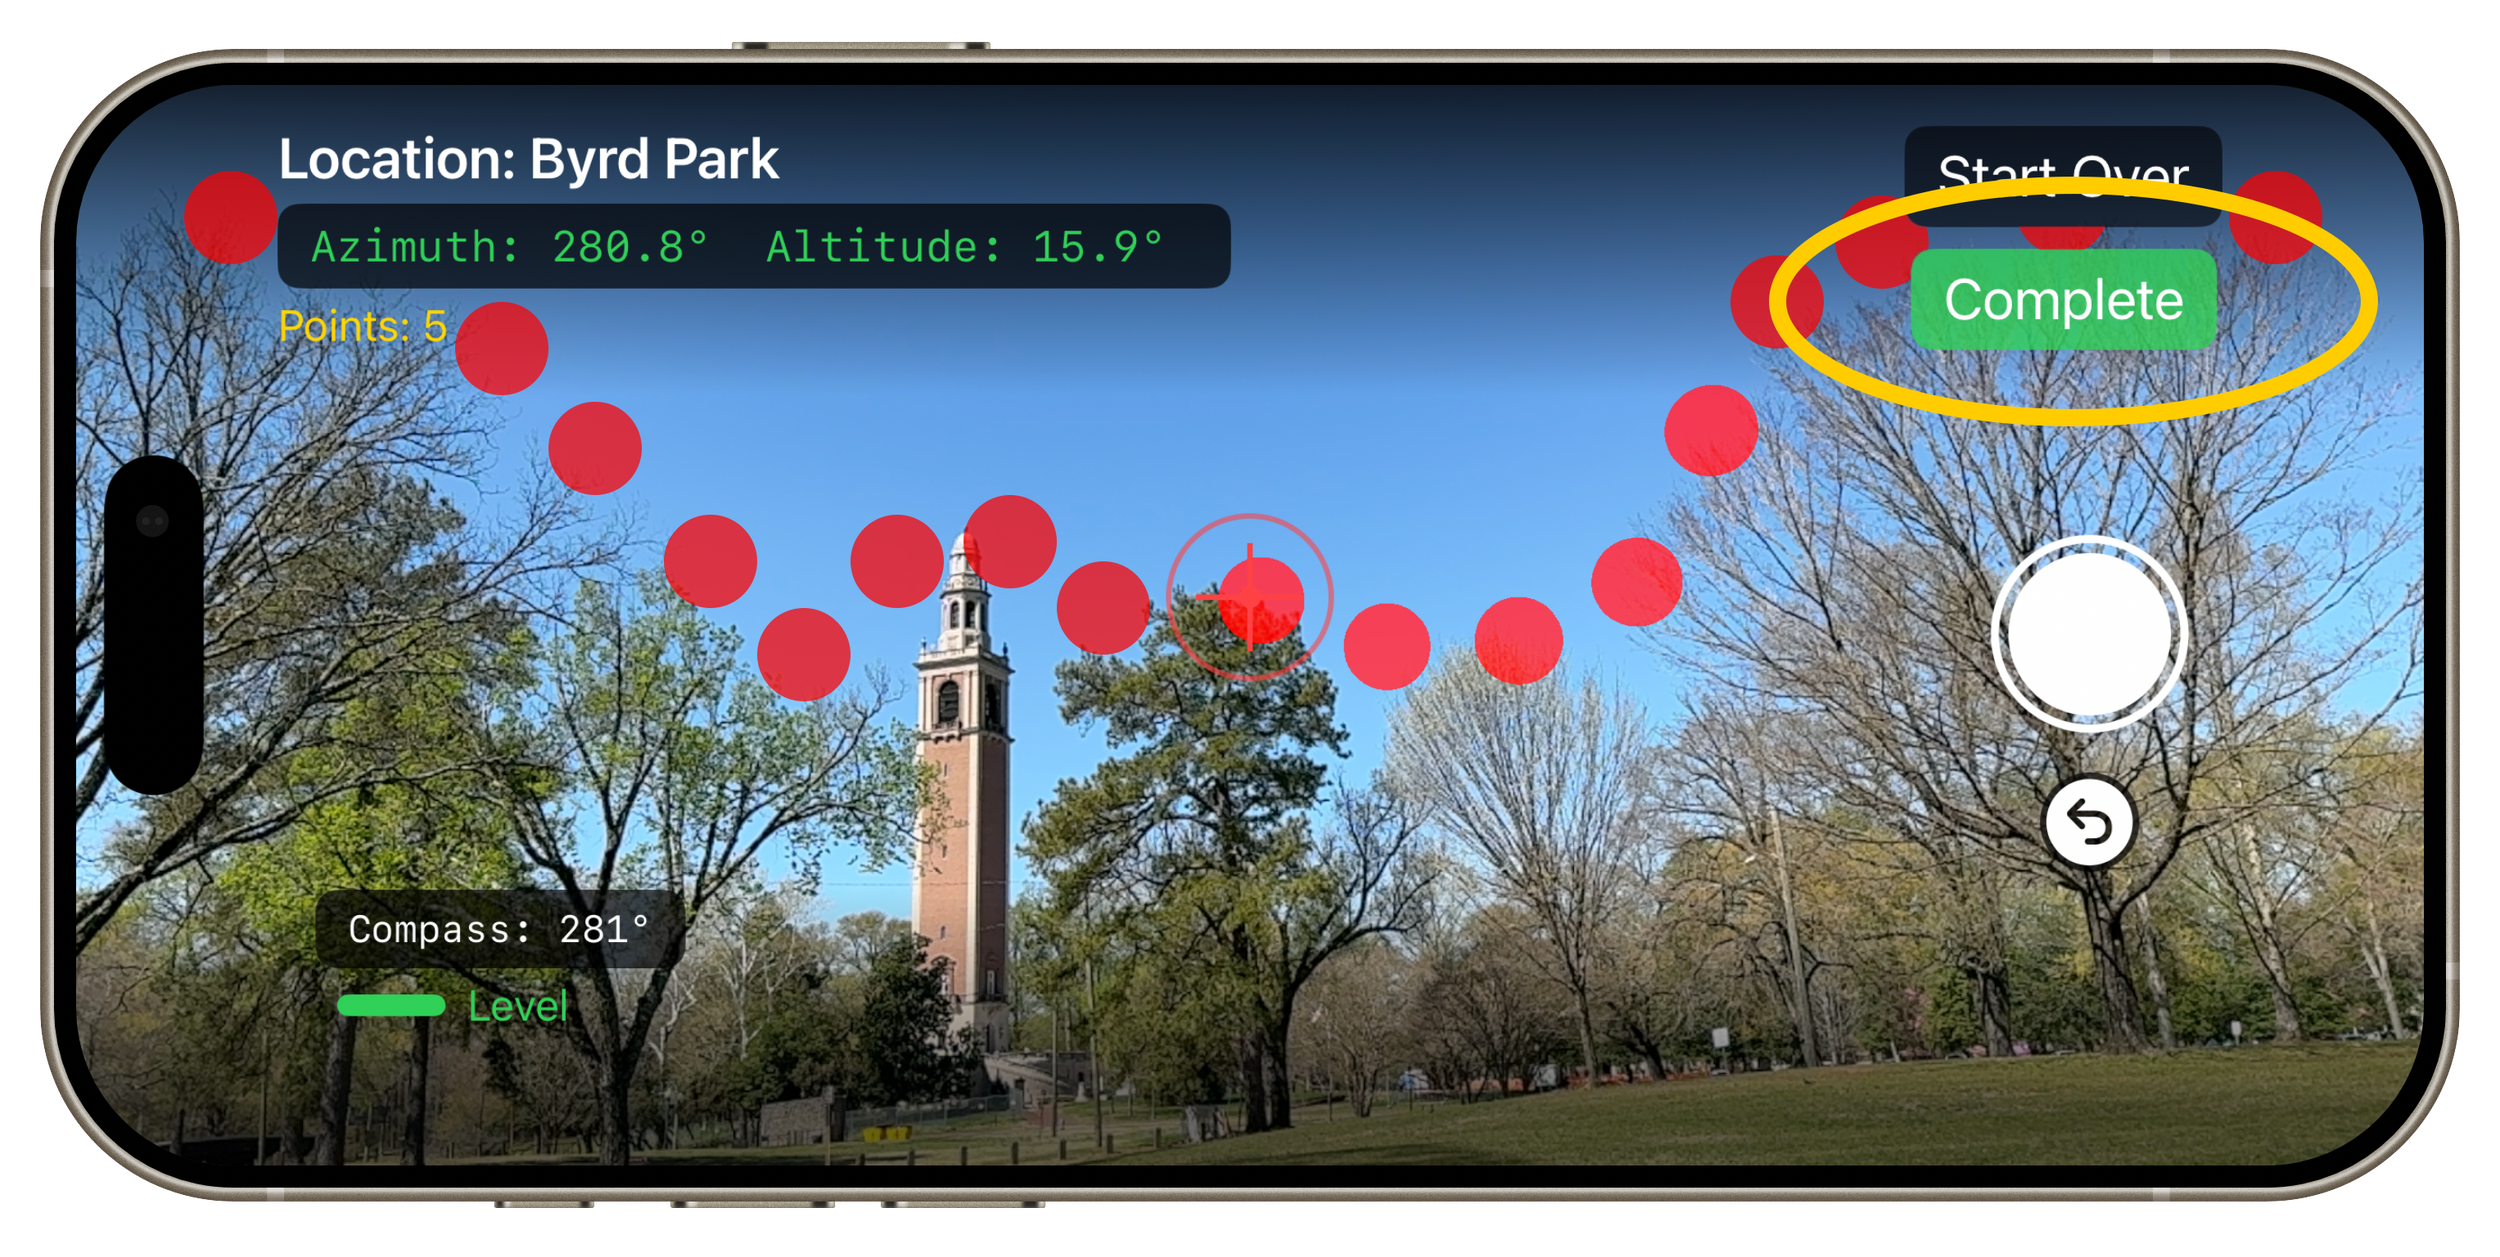
Step 7:
As you near the end of your tracing, drop the last point, then click the Green Complete button.
Pro Tip:
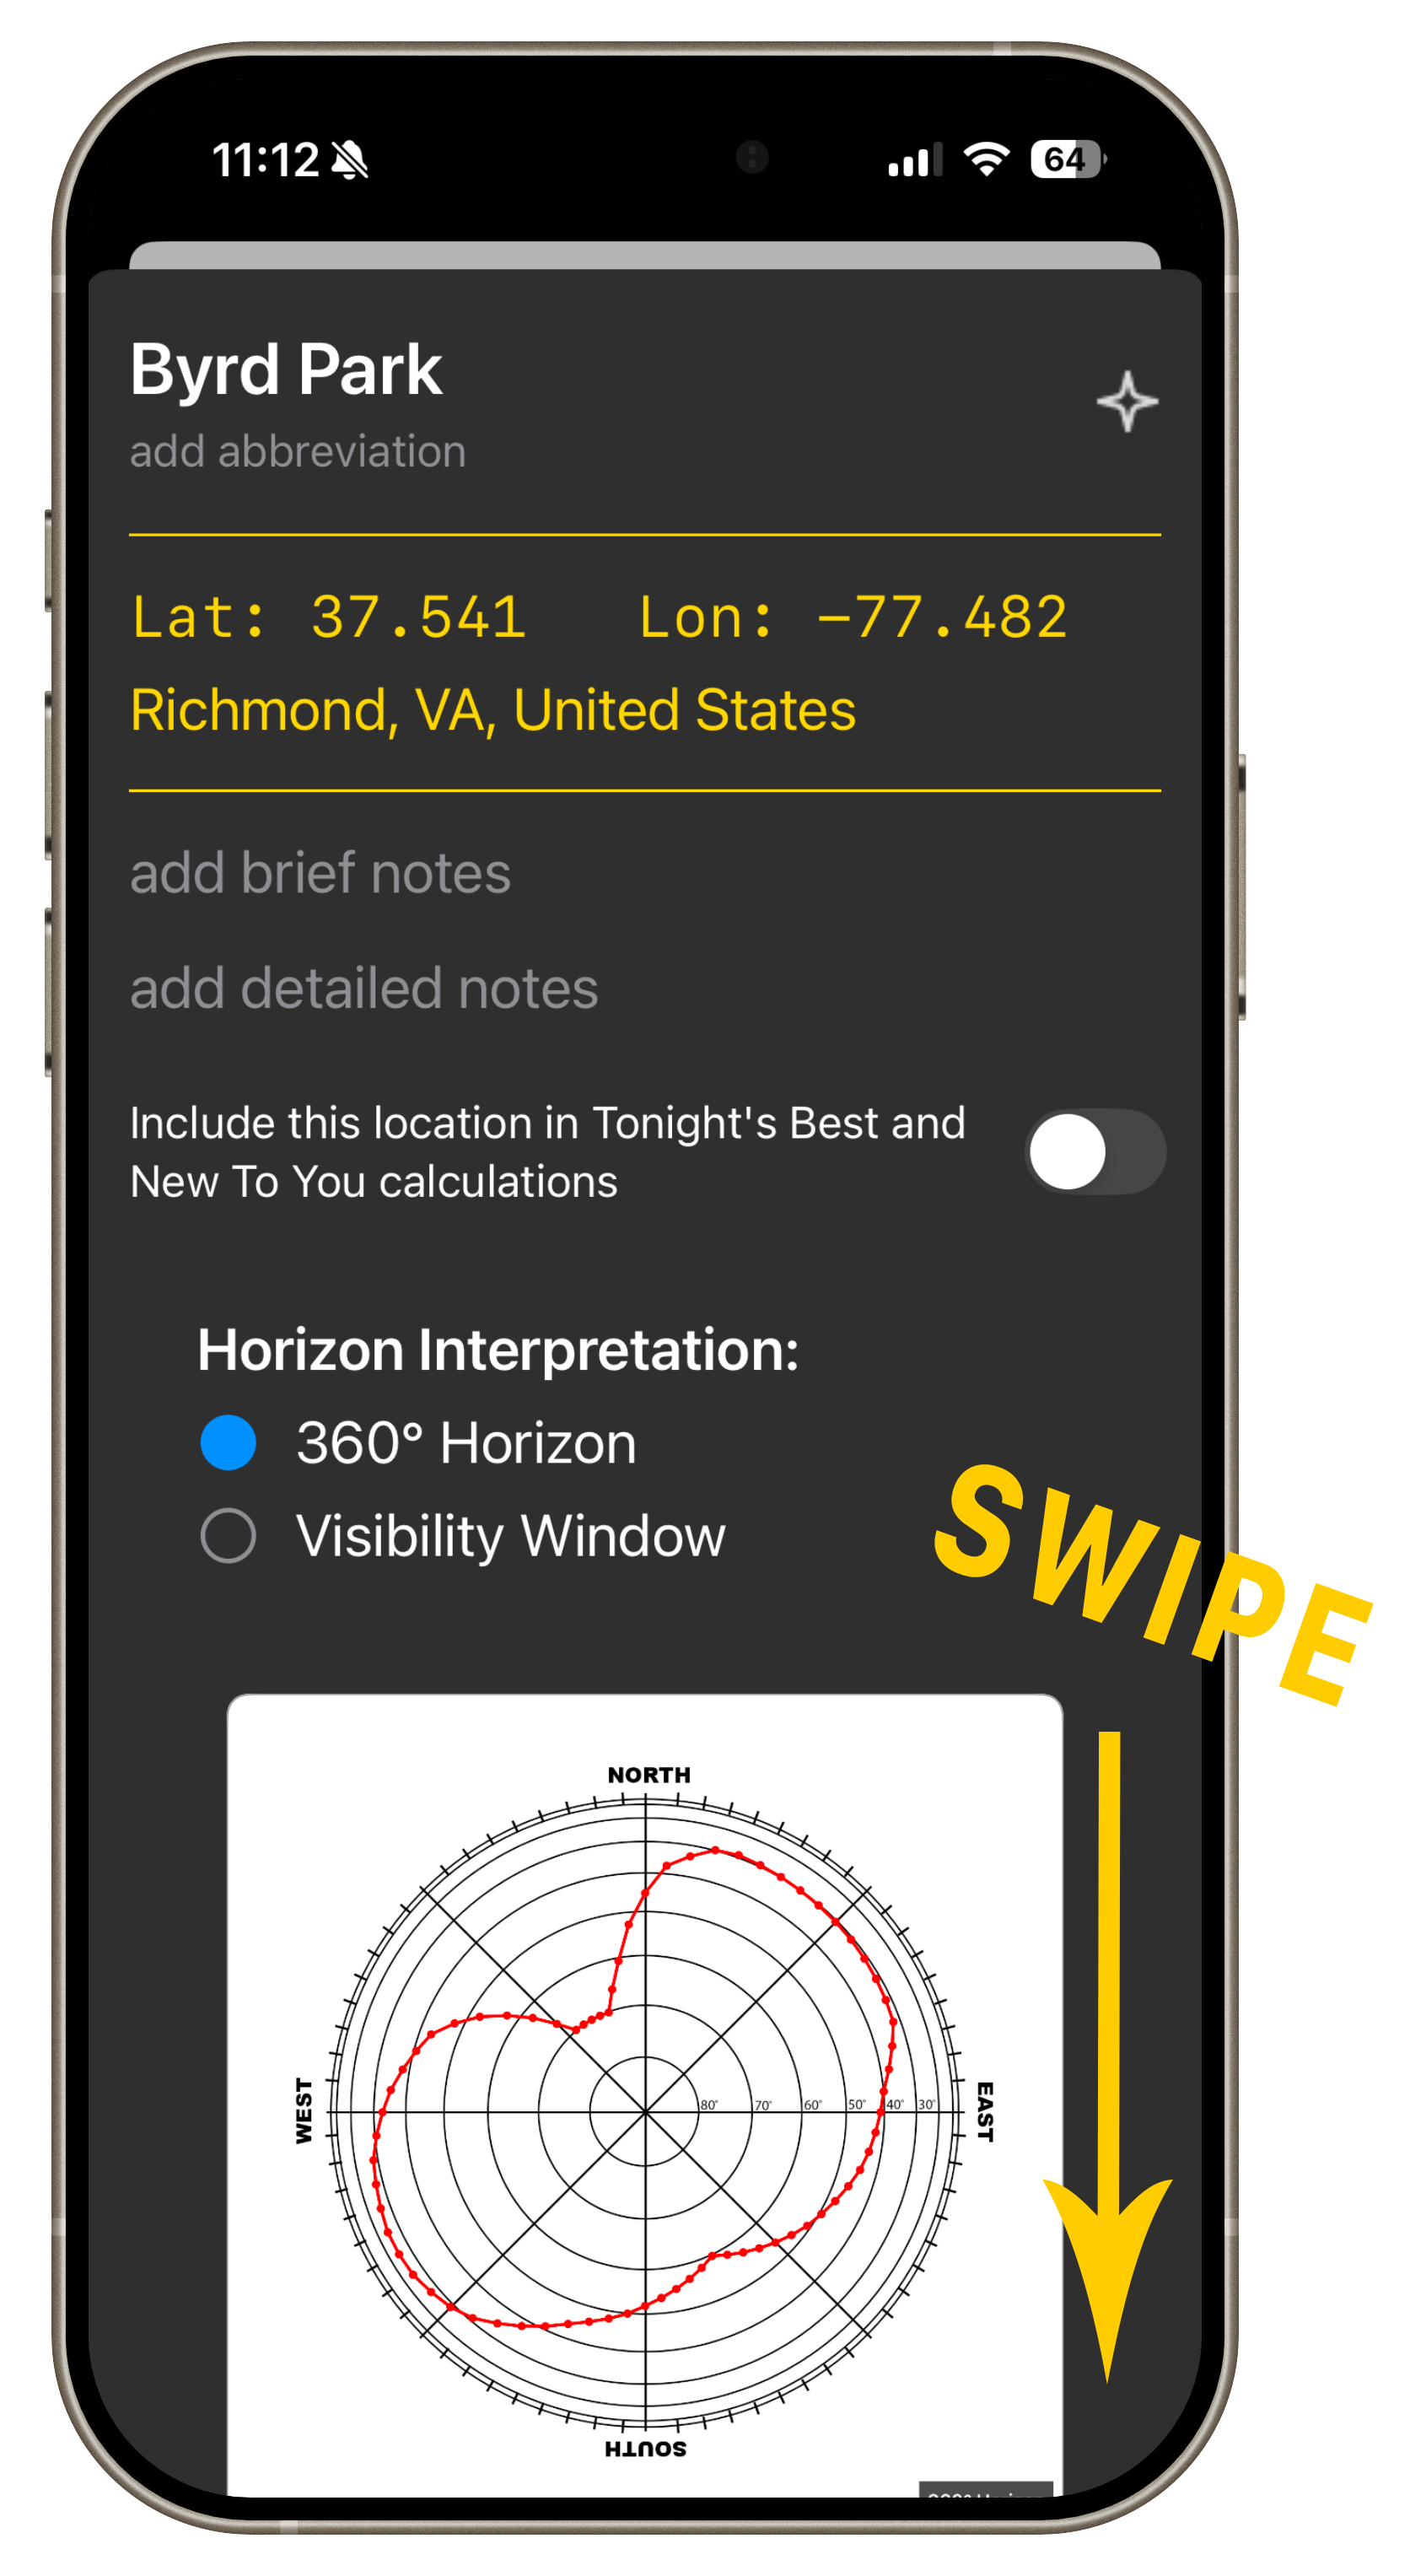
Step 8:
Swipe down to close the location detail page
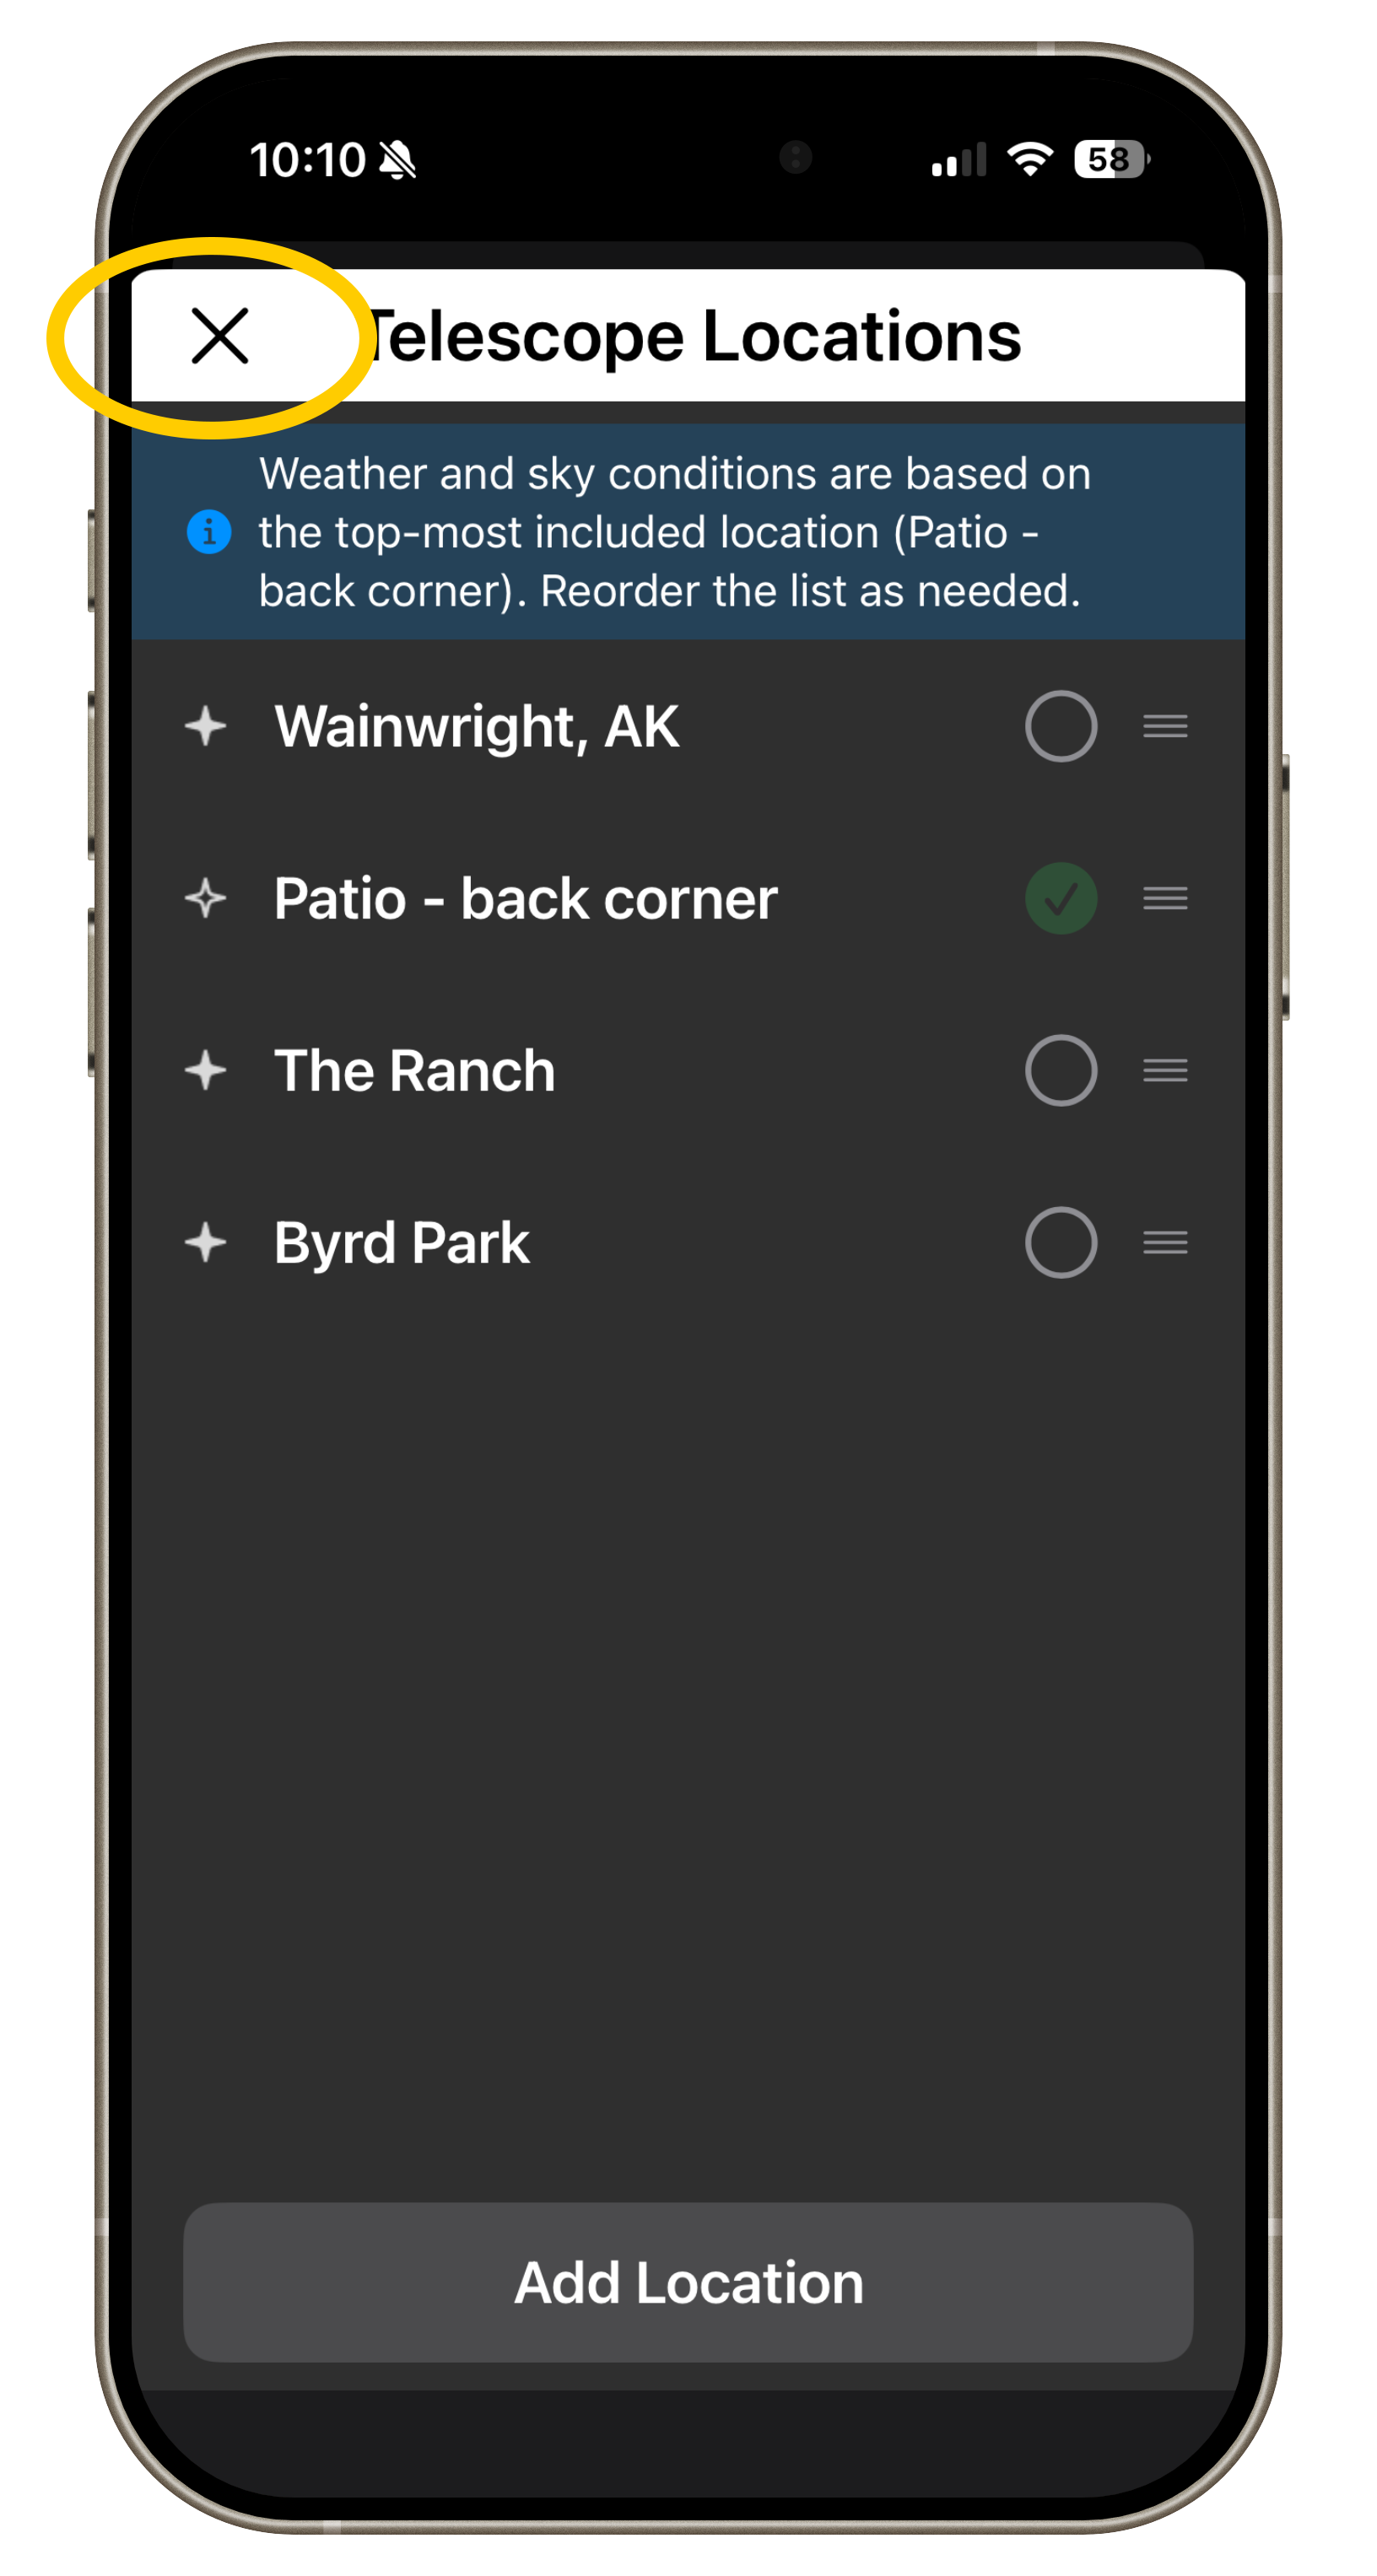
Step 9:
Close the location management page.
Trace many possible locations on your property, and keep them "included" on the location management page. SkyPlanner will tell you where the best location is for any particular target.