
Add an Object to the Database
Step 1:
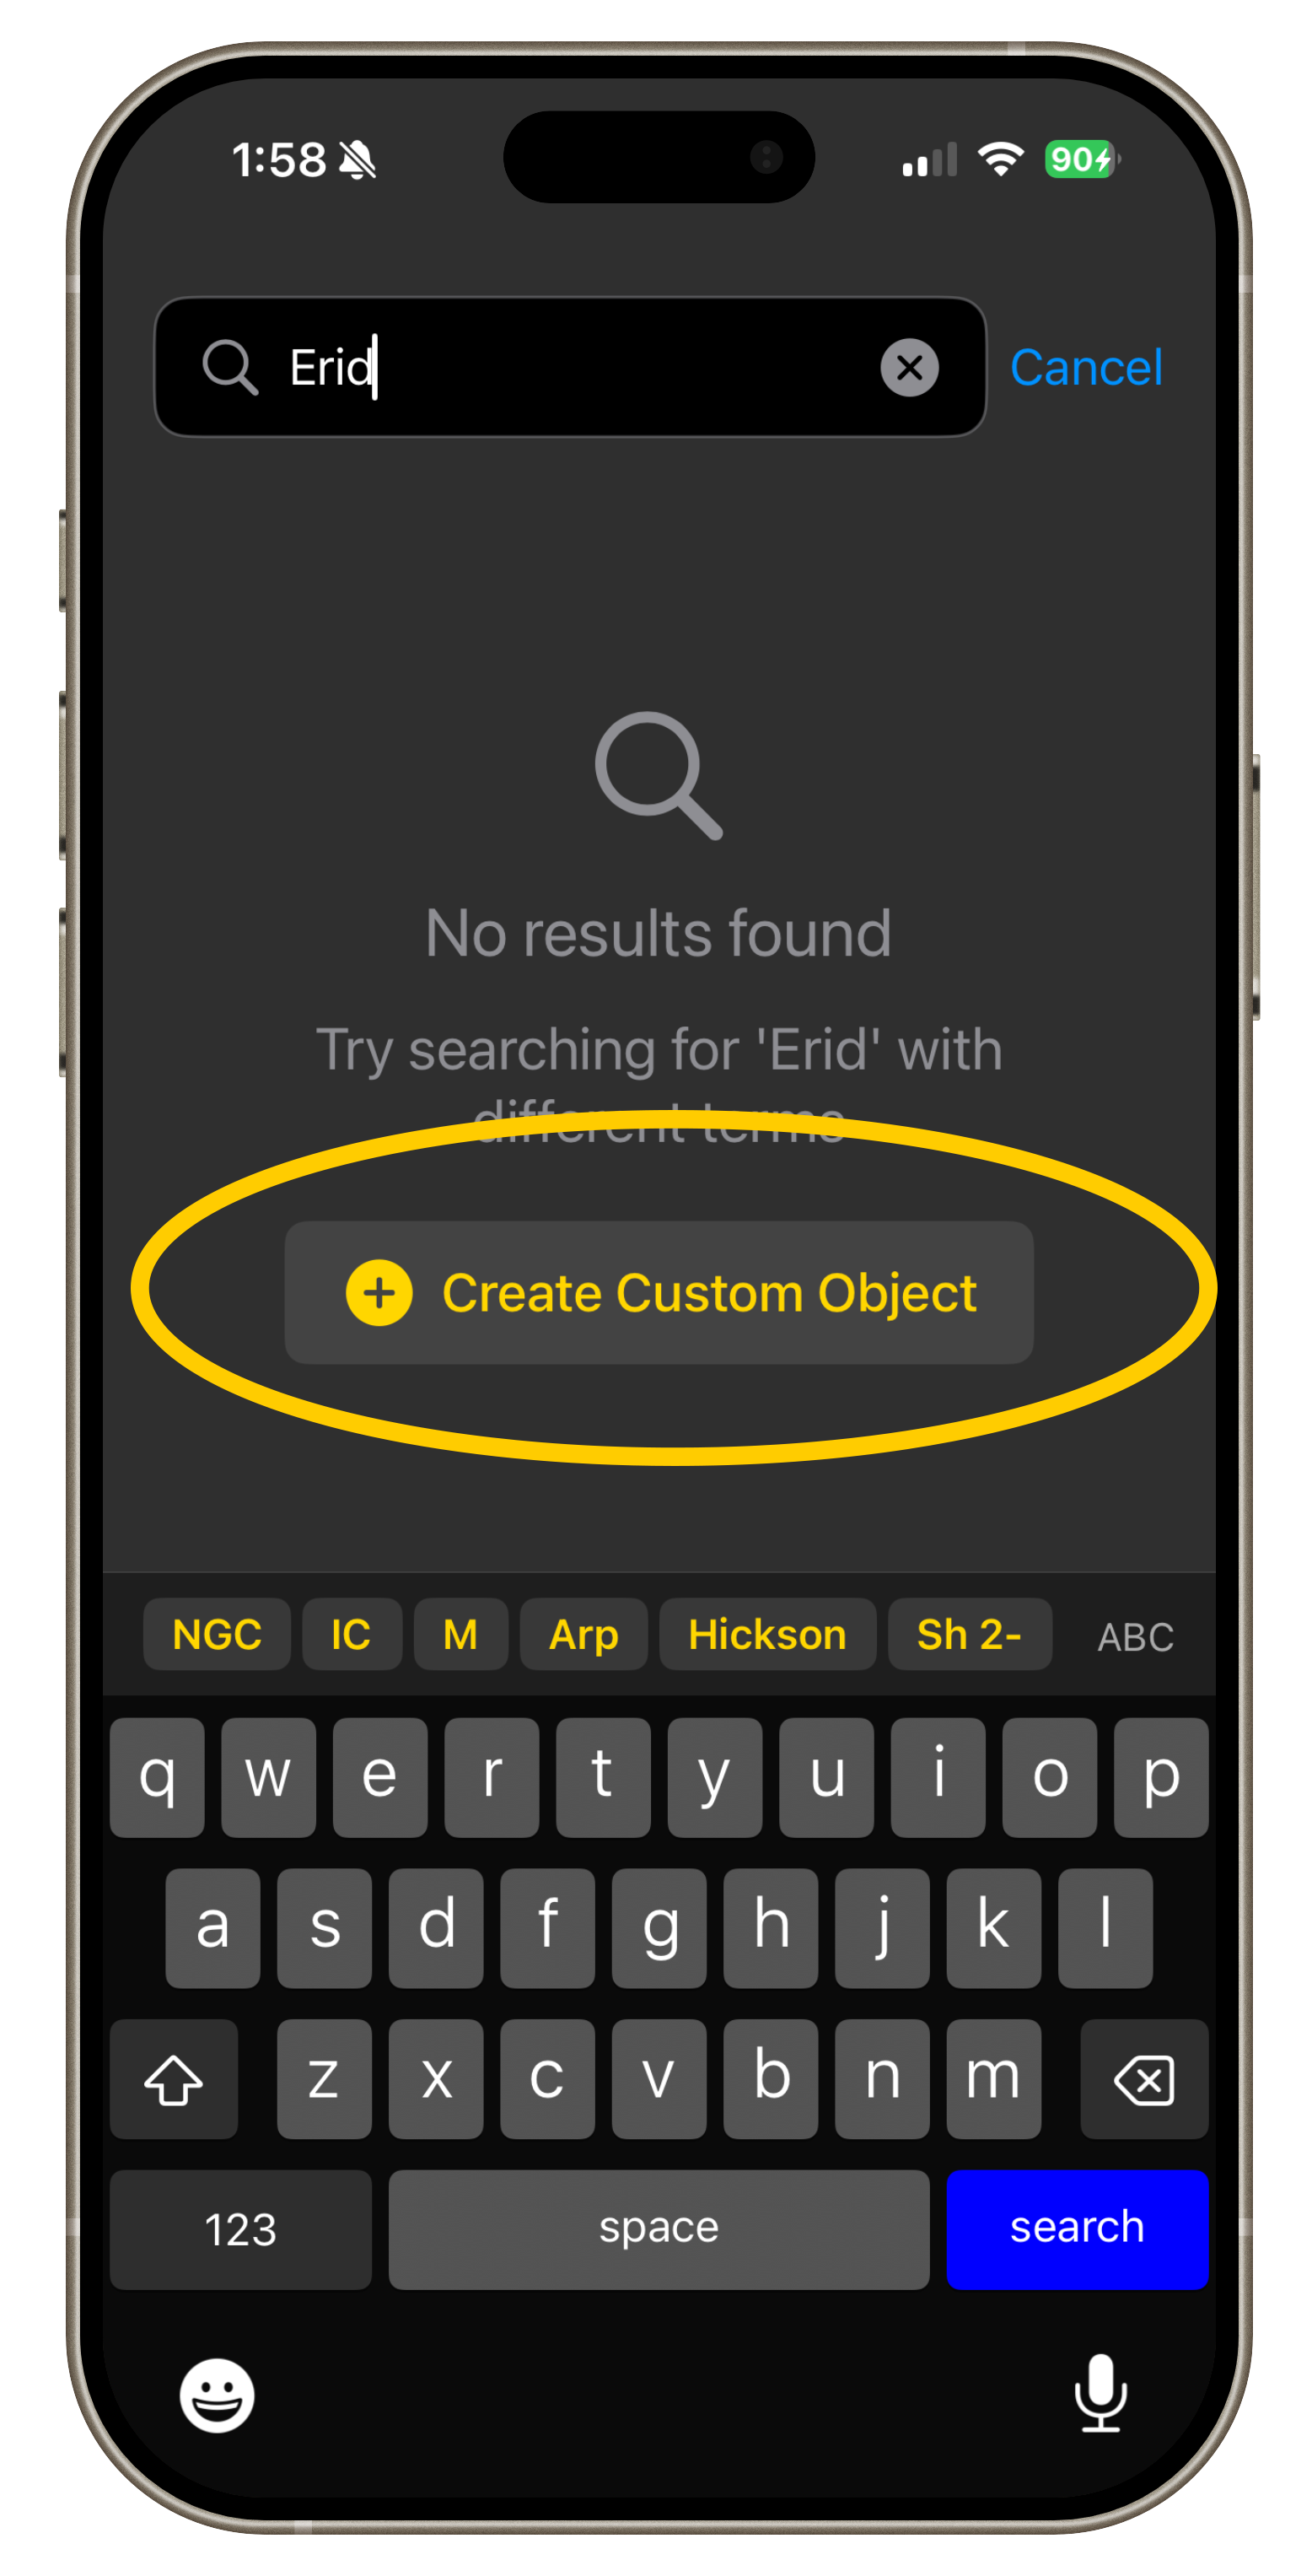
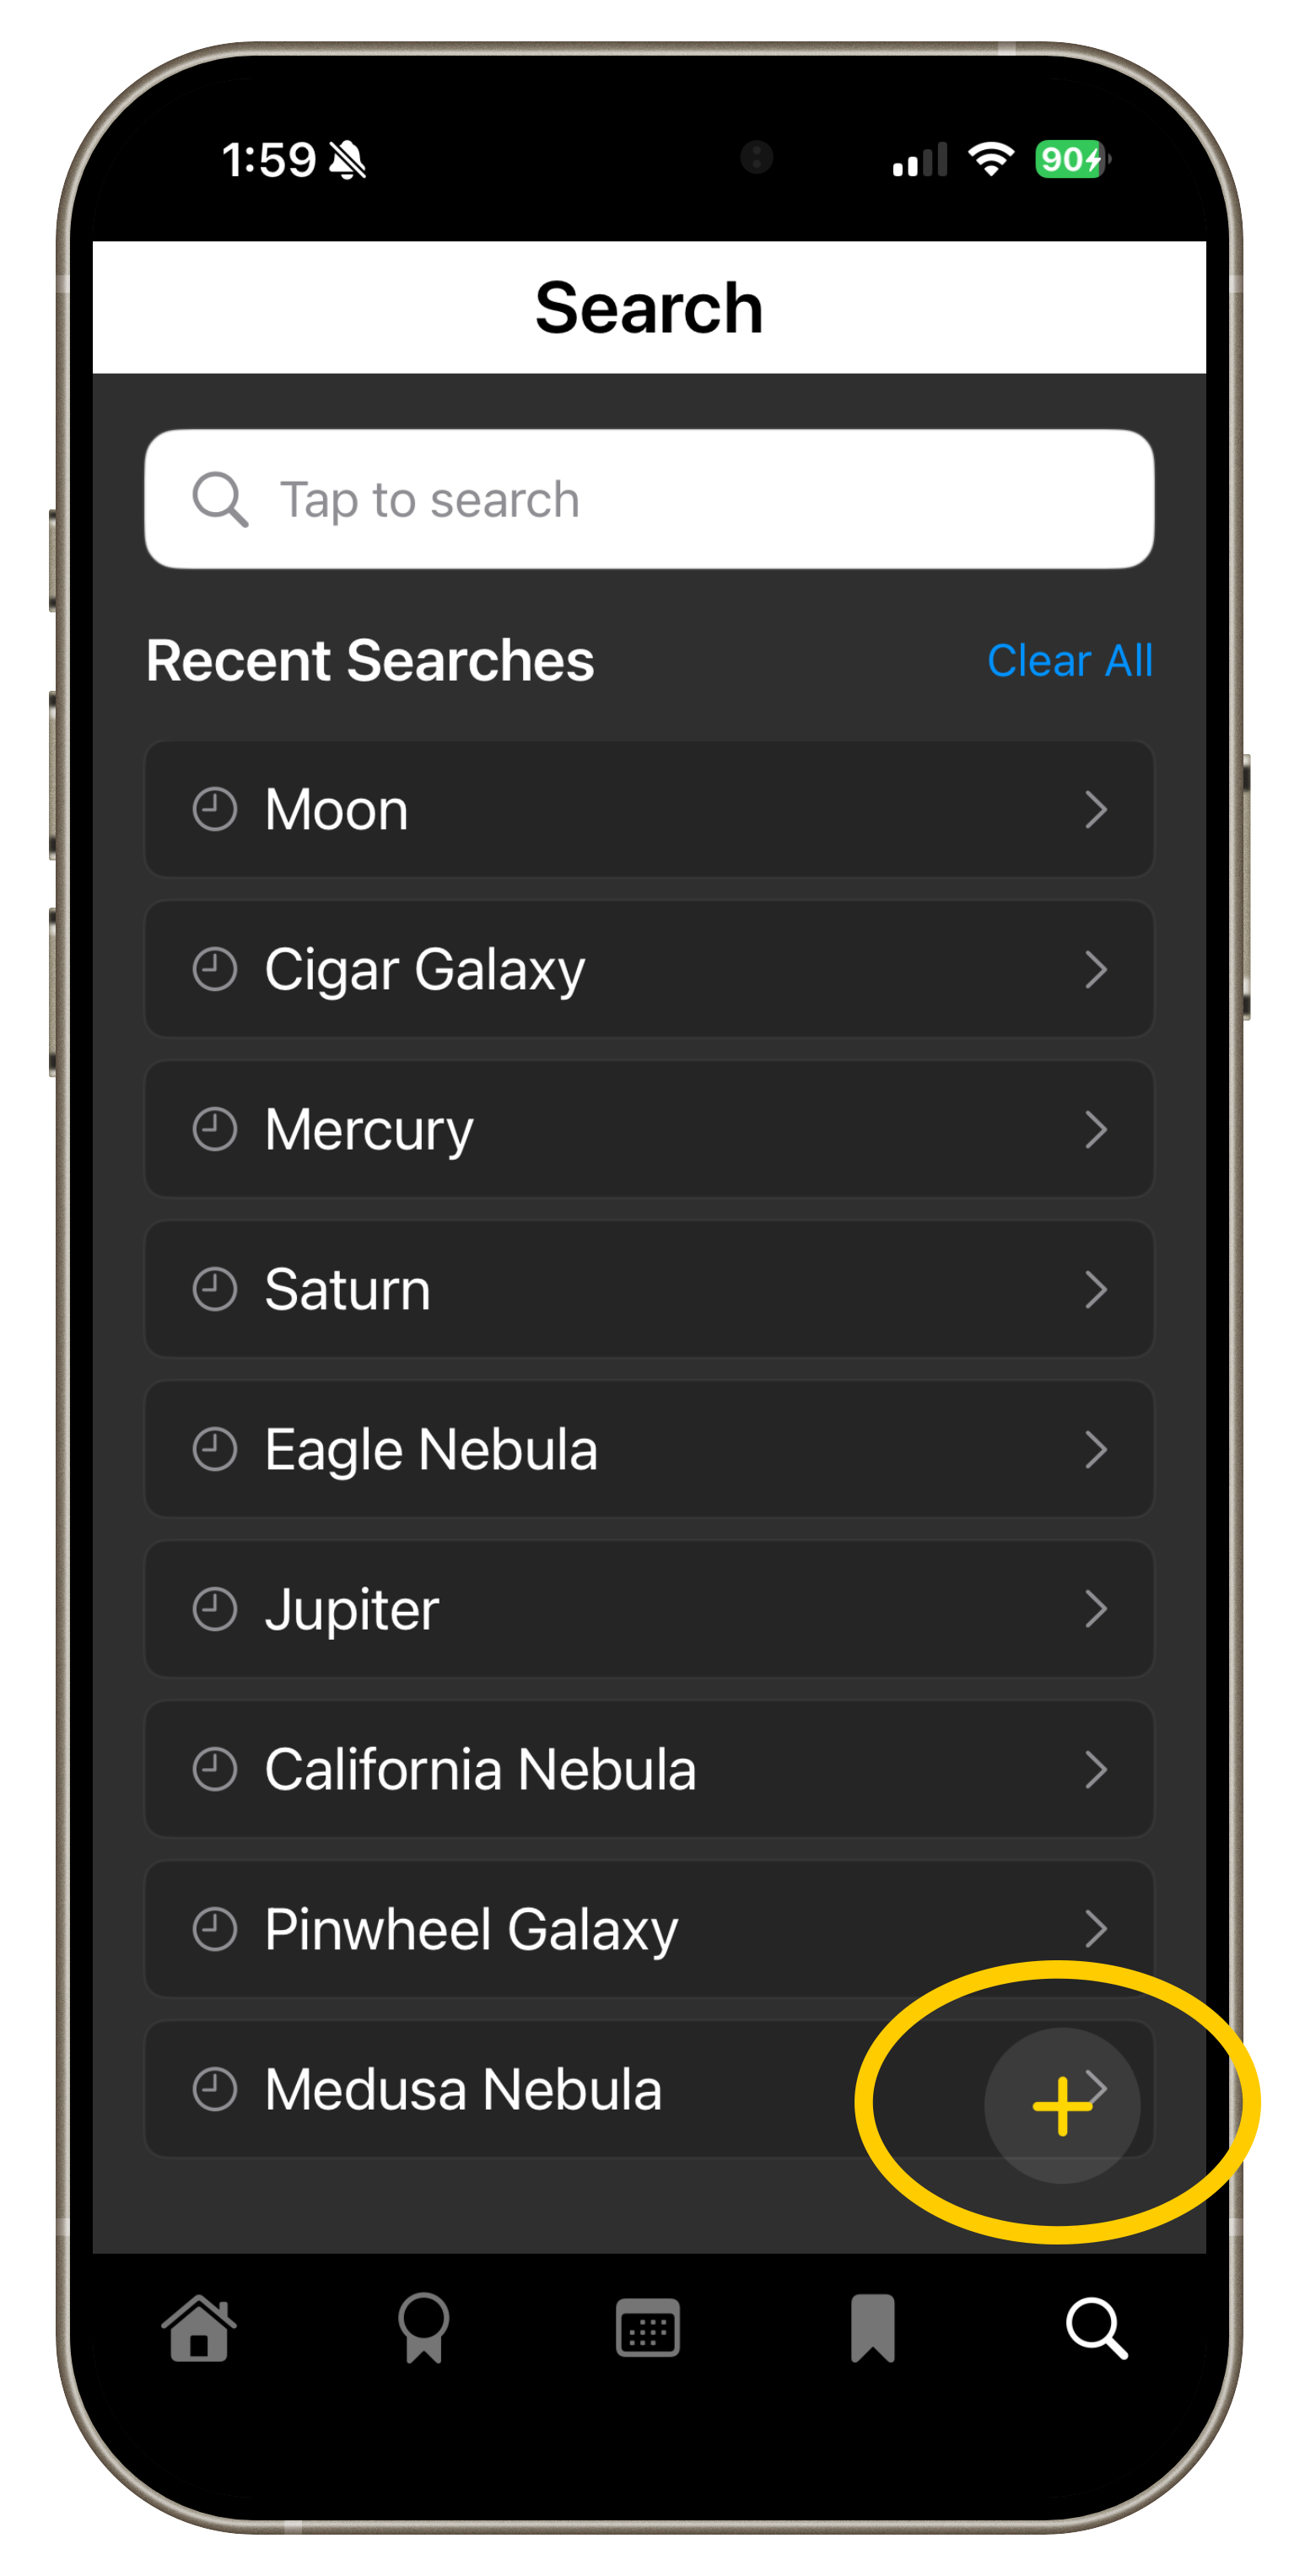
From the Search page, click either the yellow + button, or the Create Custom Object button on a search with no results.
Step 2:
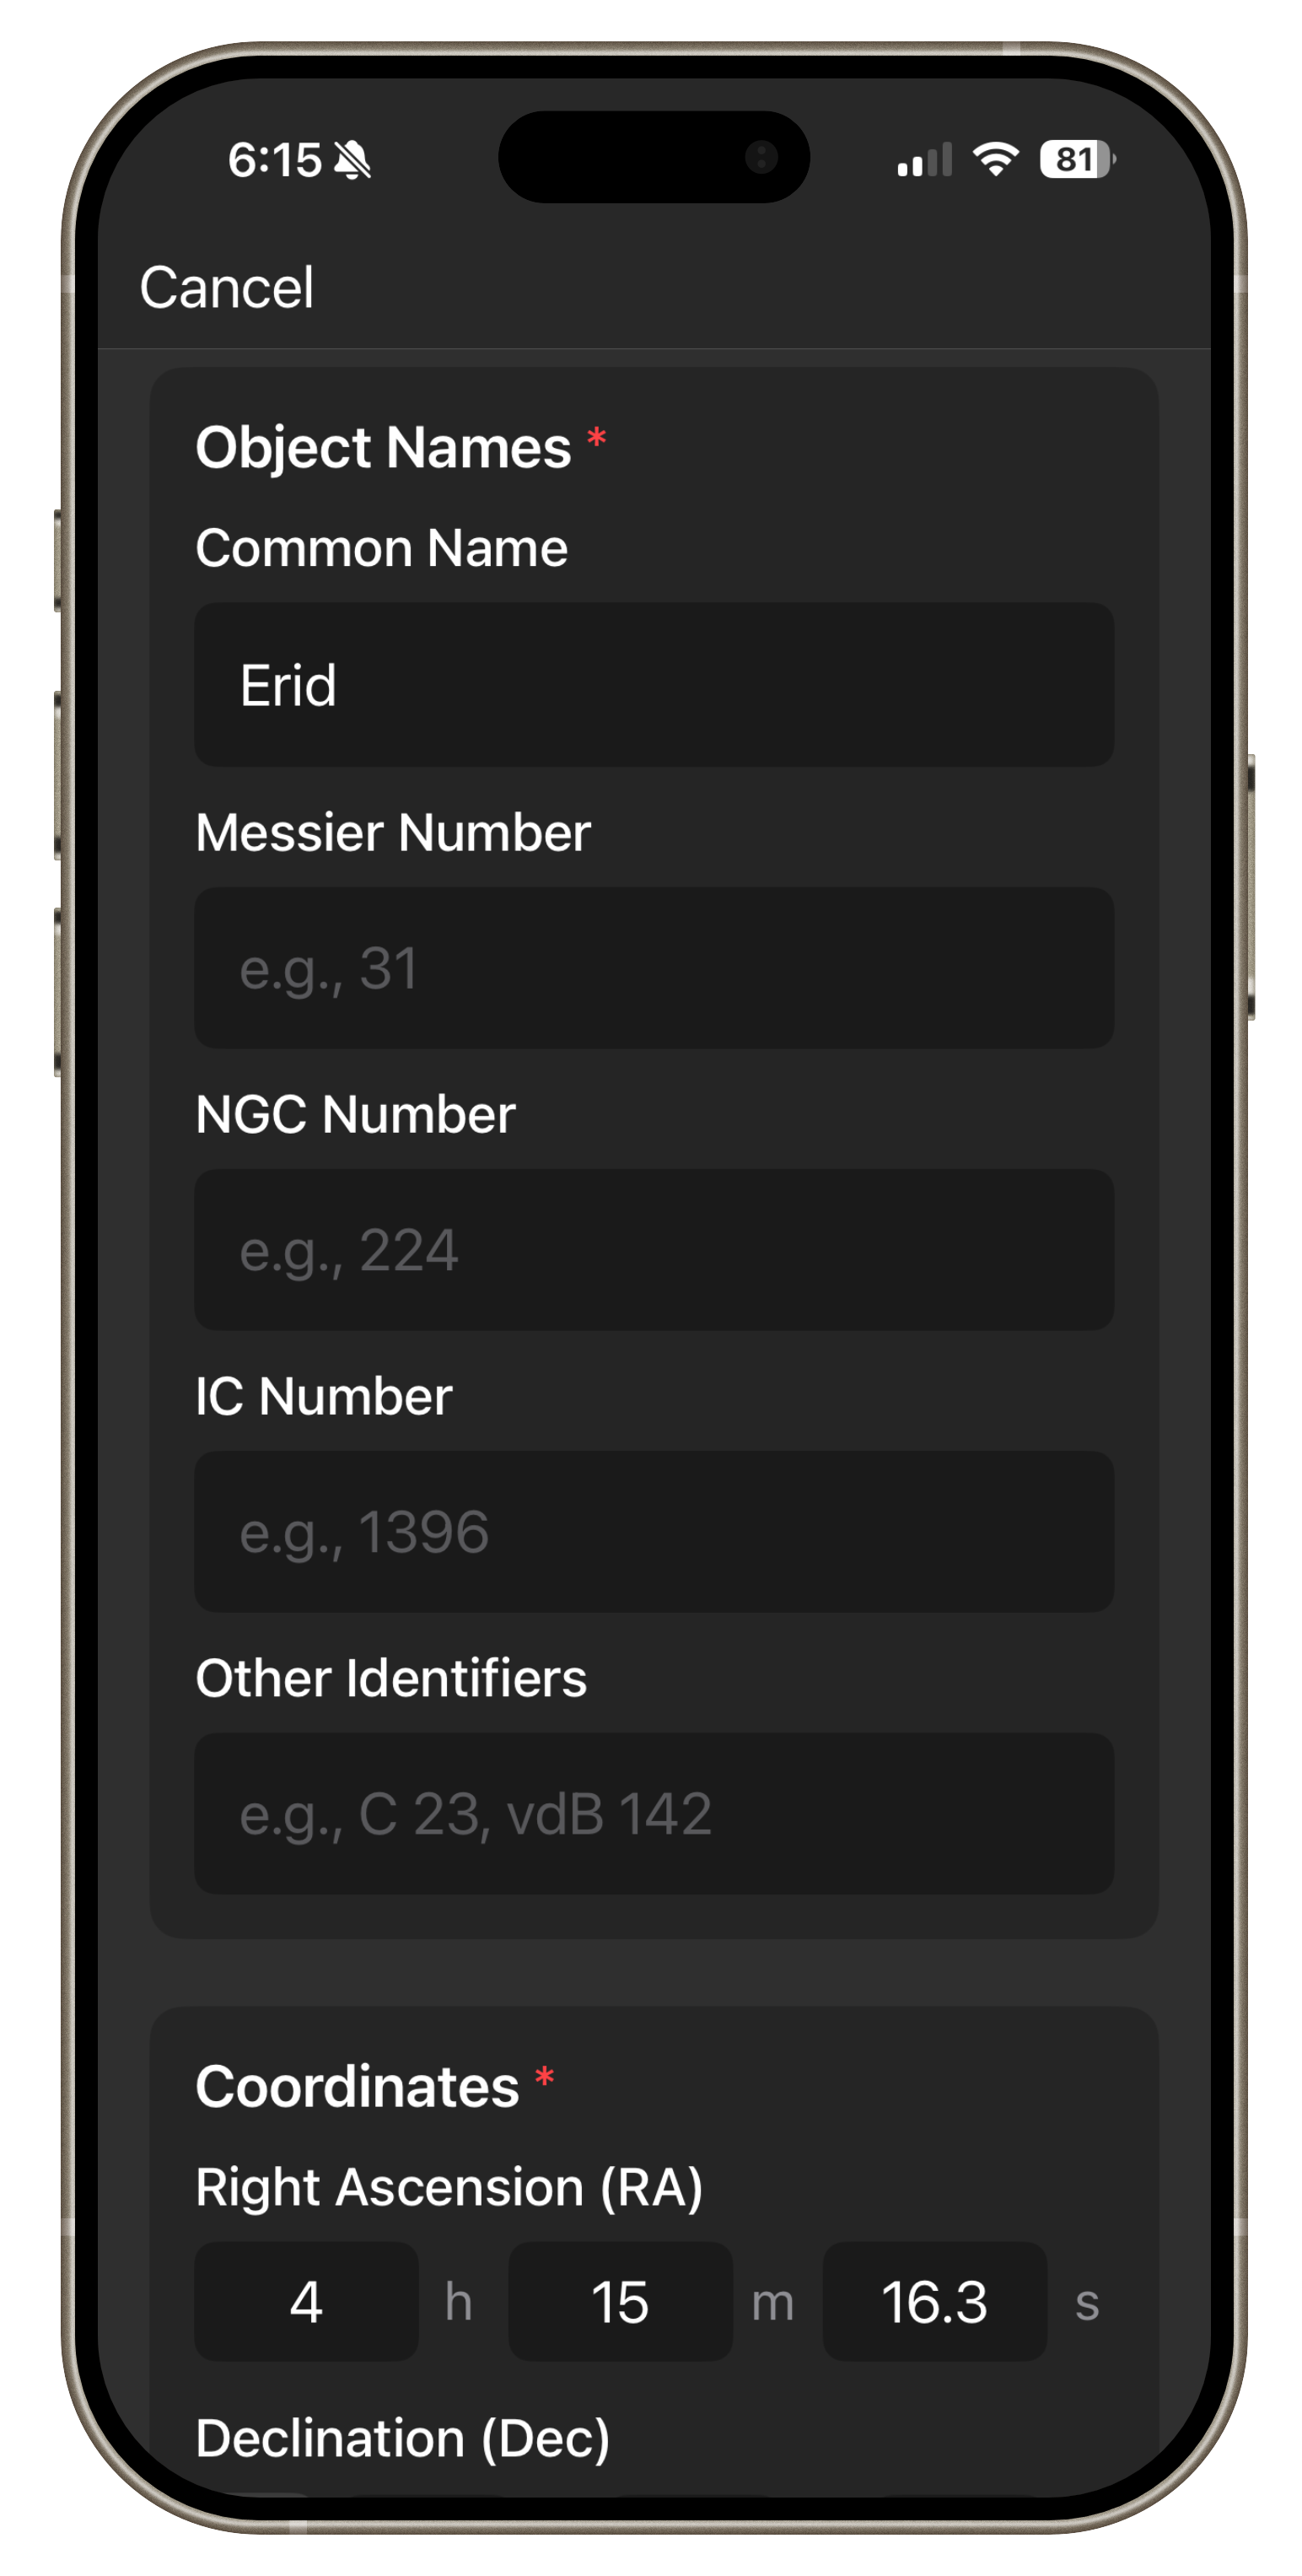
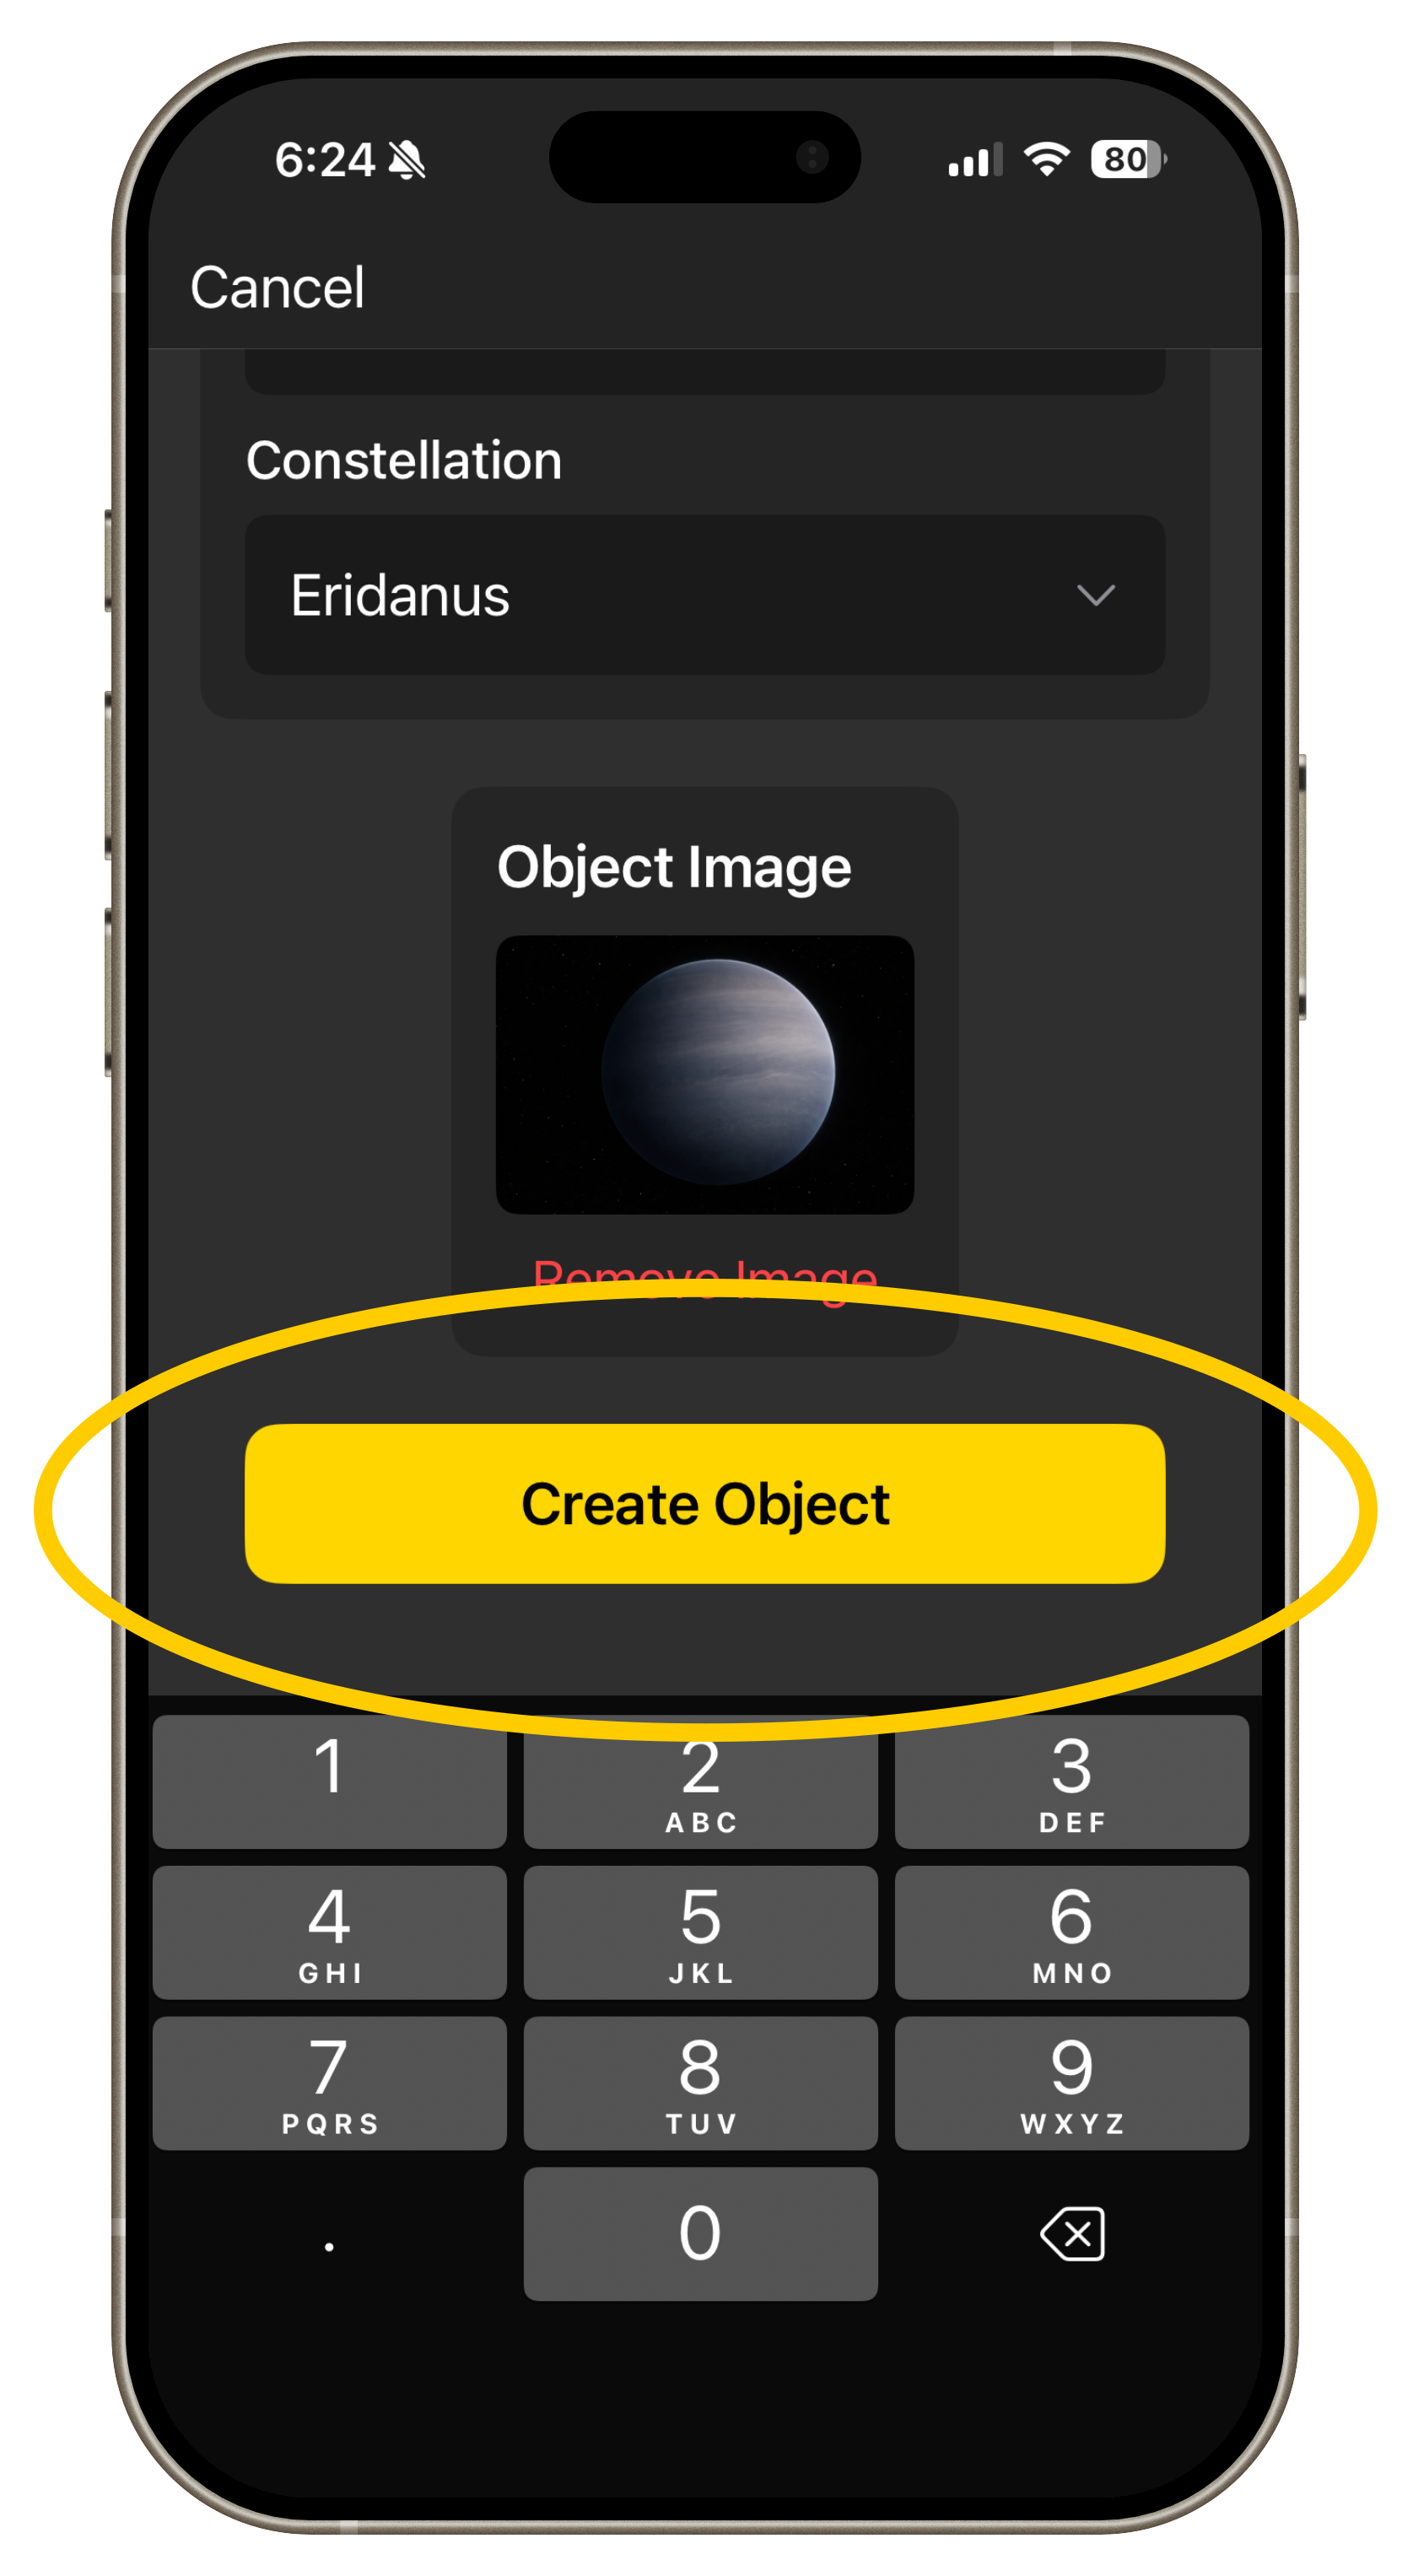
Add in details about the object. Note that you must include some type of name or catalog number, an RA/Dec pair, and object type. The other properties are optional.
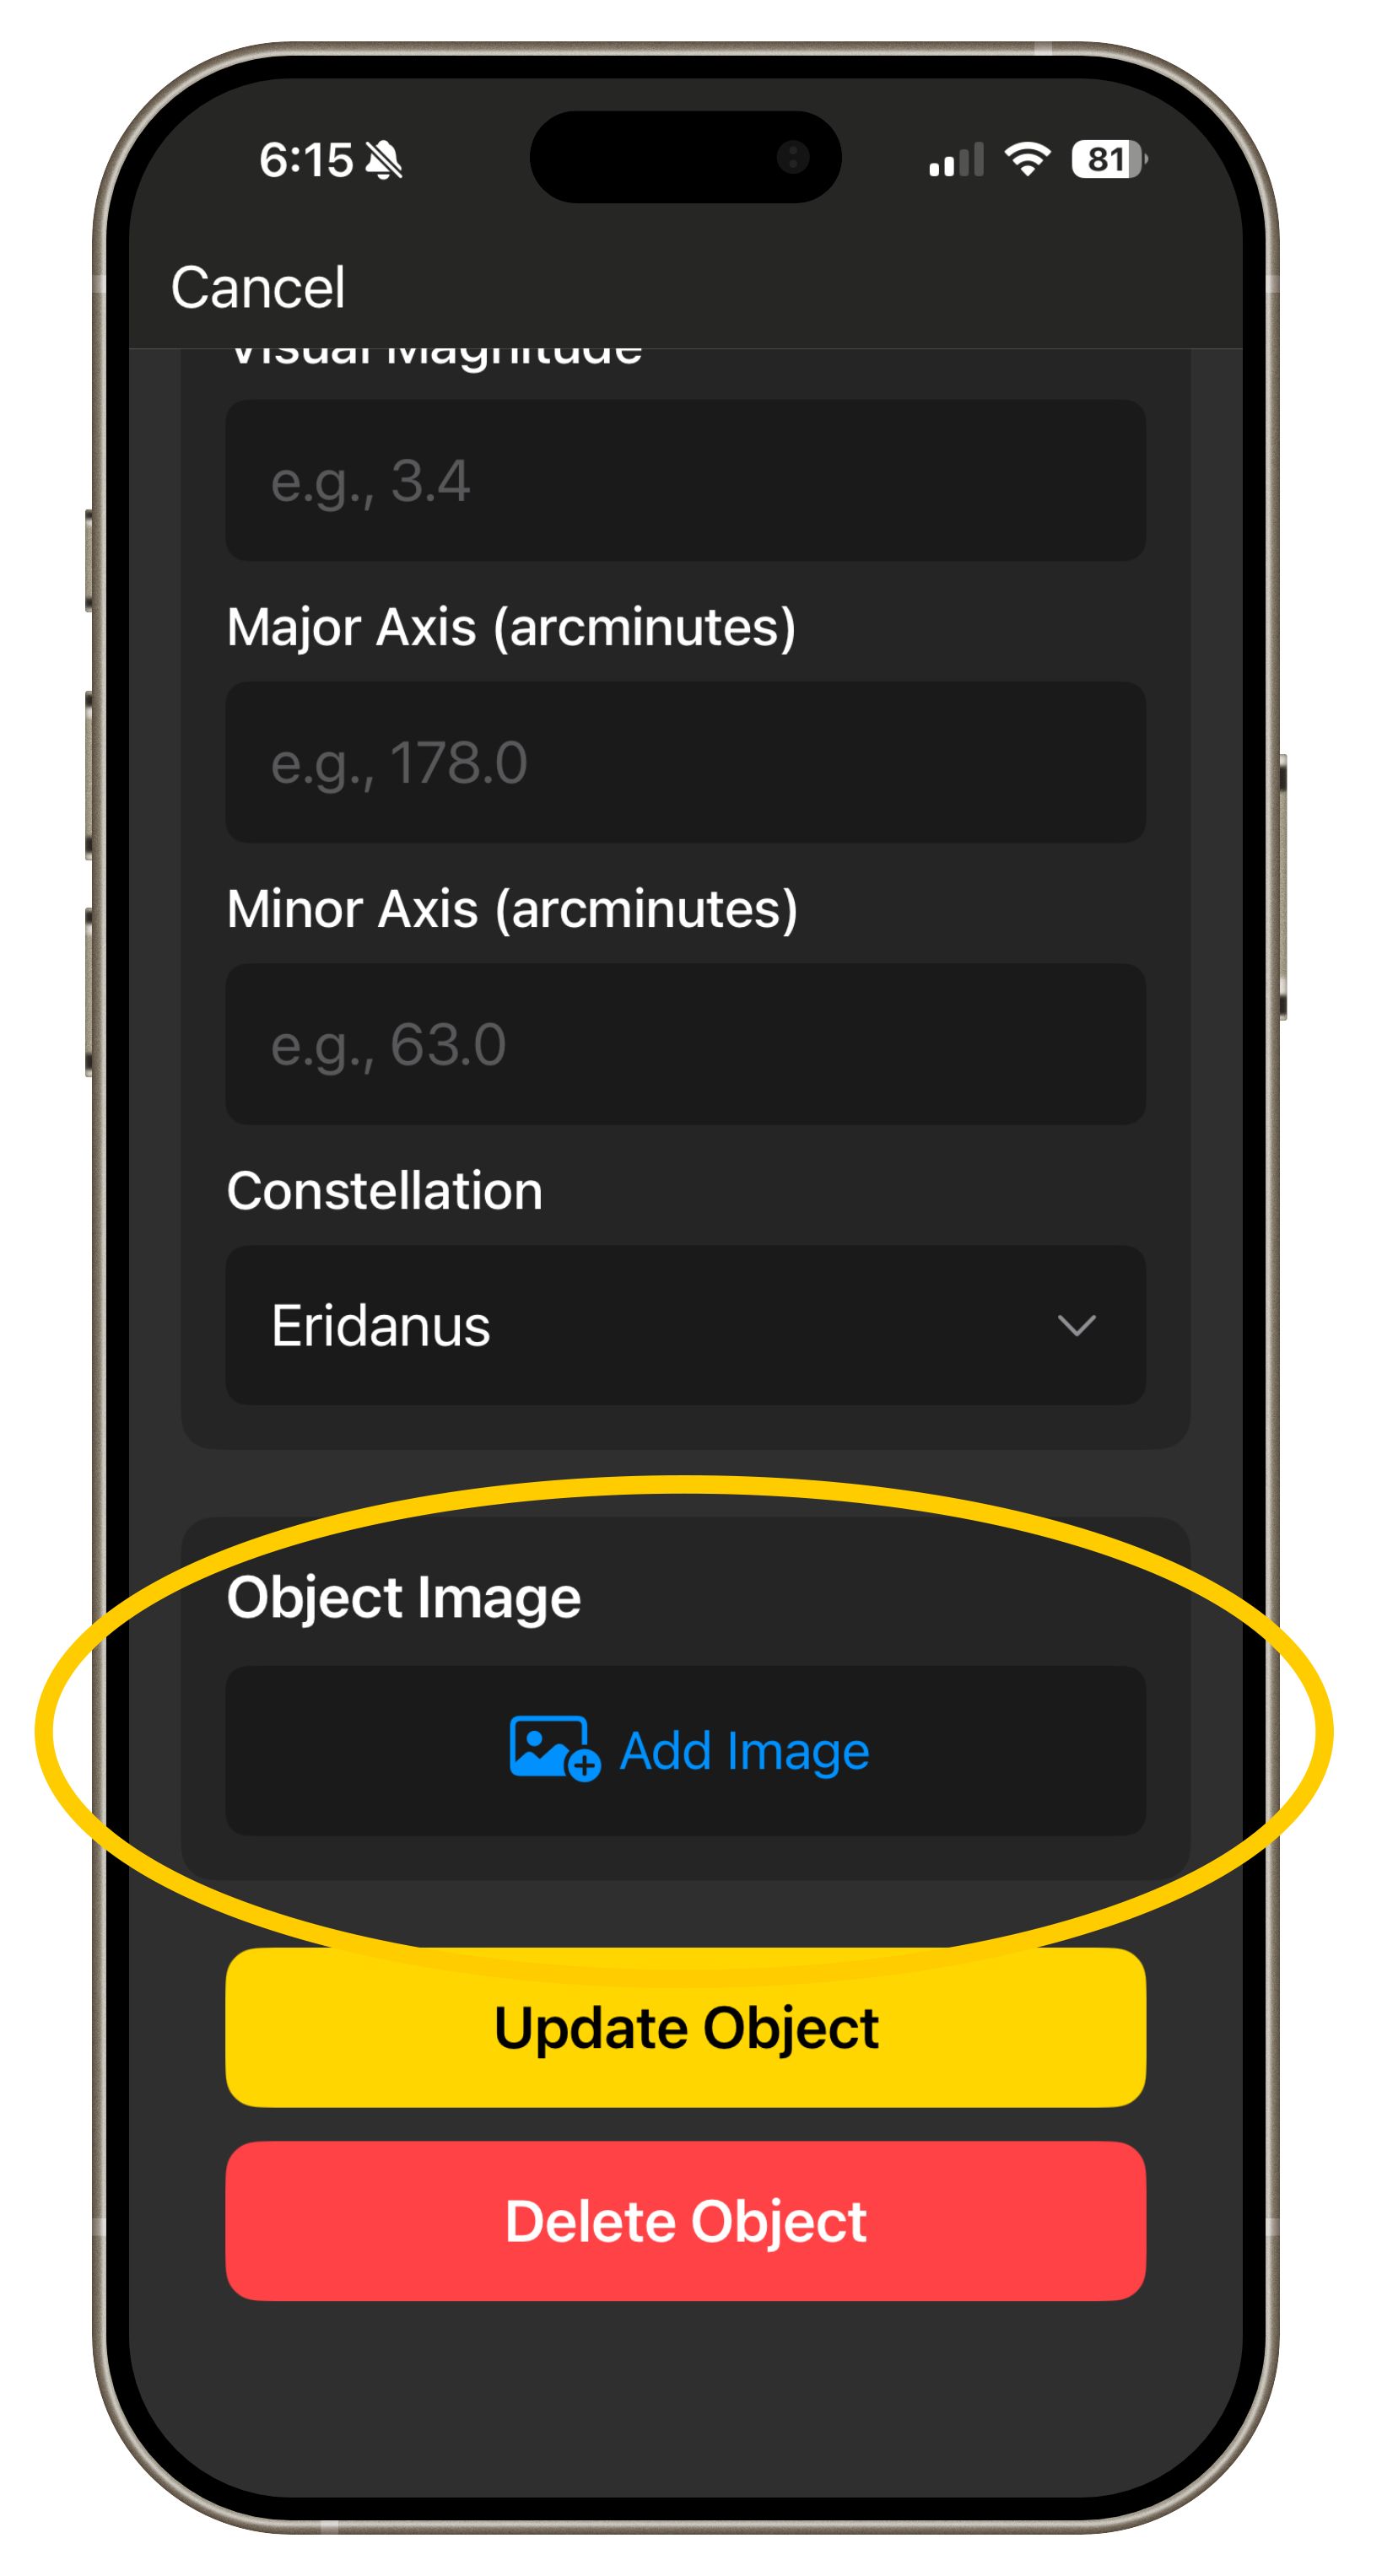
Add a photo if available. Skyplanner works best with object photos.
Step 3:
Step 5:
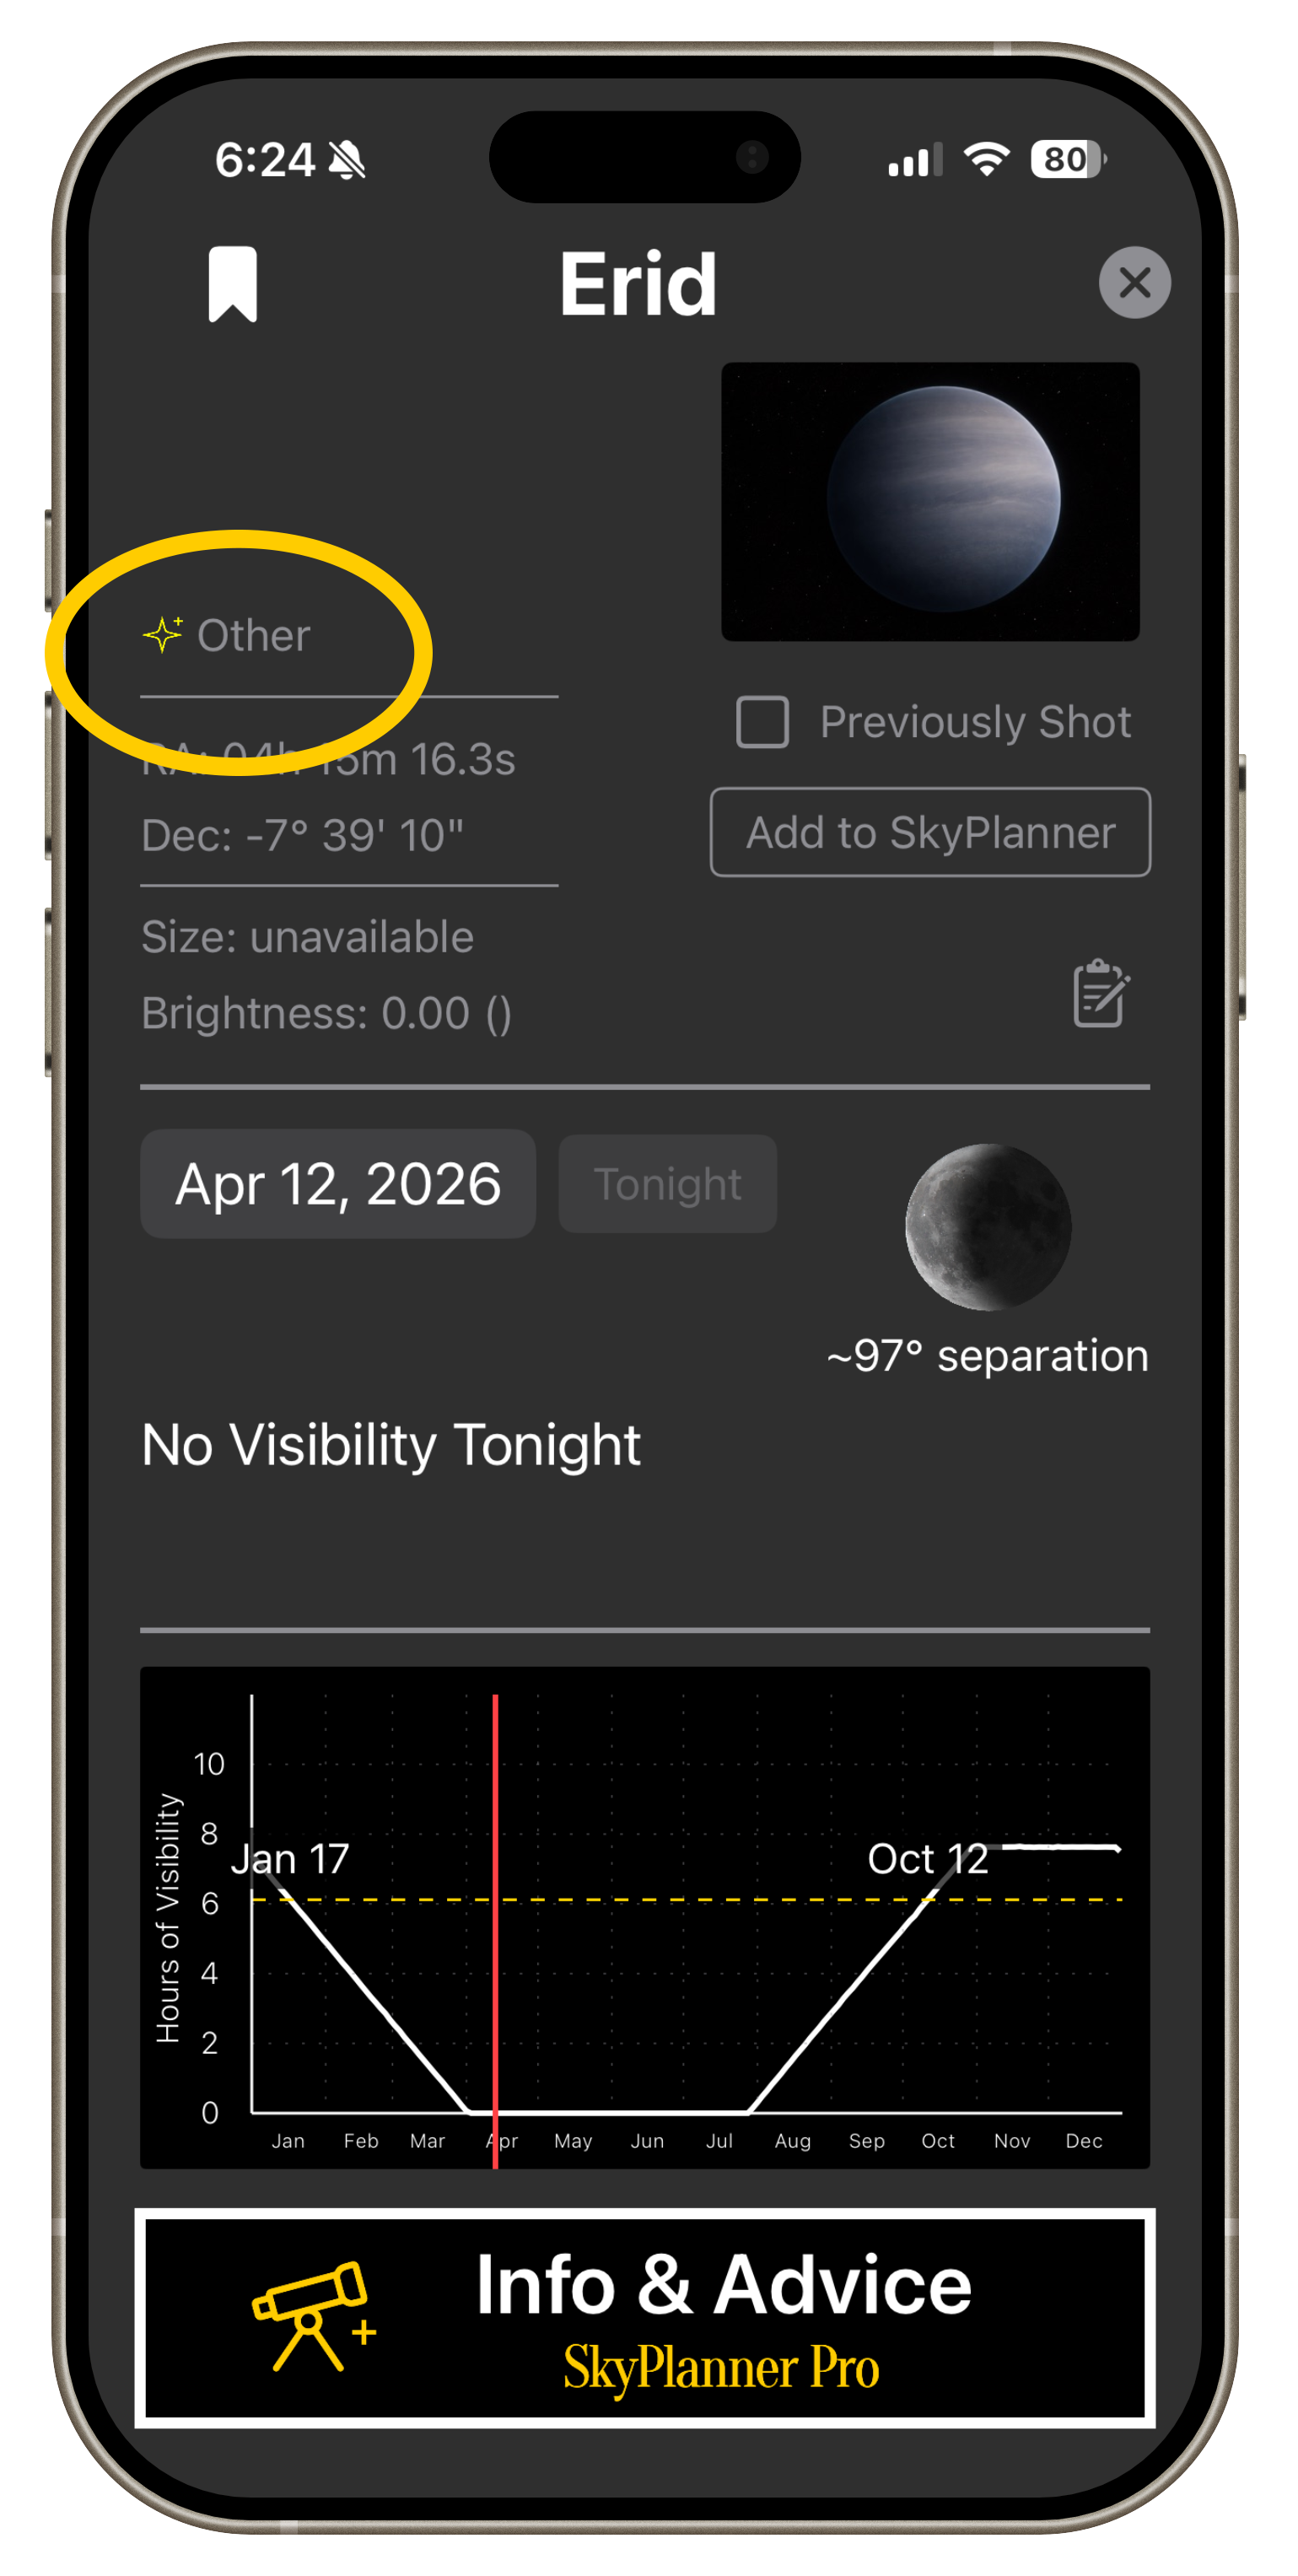
Your custom object now has a detail page like all other database objects. It can be a favorite, added to the planner, and will show in search results.
Step 4:
Pro Tip: SkyPlanner Pro is NOT needed to add a photo to a custom object.
Click Create Object
Pro Tip: Click the yellow star icon in the upper left of any custom object to edit details or delete.